
Blog App Tutorial
Index
- Overview
- Create a New User
- Login
- Signup and Login: Loose Ends
- Public Feed
- Schema
- Data
- Pages
- Create the feed page
- Sidebar: Preventing future loose ends
- Display post author
- Test in Incognito
- Redirect users to Feed on Login
- Create new blog posts
- Conclusion
Overview
What you will learn
This introduction to Structr will guide you through the creation of a simple Structr blog application. We will start from an empty Structr instance and build the blog application feature-by-feature, walking you through how to deal with access control, authentication, and applying basic bootstrap.
You will need
- A fresh Structr instance running in your browser
- Access to the command line running Structr
- An incognito browser window open
- Access to the neo4j-users Slack so you can ask for support in #using-structr
The Features
Before we begin, we should define the features the blogging application will have. The tutorial application has the following features, presented as user stories below:
- As a public user, I can create an account
- As a public user, I can log in with an existing account
- As a public or authenticated user, I can see a feed of all the posts currently in the application, sorted earliest-first
- As an authenticated user, I can create new blog posts that include a title and body text
The outline of the data model emerges from the following features:
- User nodes will exist with some sort of name and password properties.
- Post (as in blog post) nodes will exist with properties describing title, body text, and created date
- WRITER_OF relationships link User and Post nodes
Format
While developing each feature, the tutorial will cover the following points, named after the Structr menu item in which each appears:
- Pages
- Security
- Schema
- Data
Create a New User
- Pages: Public users will need to use the UI to create an account. Since “Signup” doesn’t exist yet, we have to create a page
- Security: Only public users should be able to see the signup UI to create new users
- Schema: Since Structr comes with User nodes built in, we will not alter the schema to implement account creation
- Data: Account creation creating a new User with each sign-up
Check the Schema
New Users will have name and password properties.
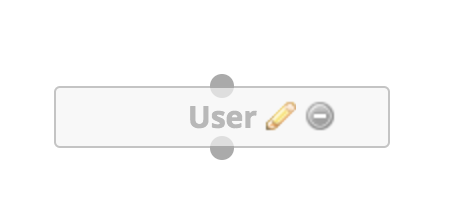
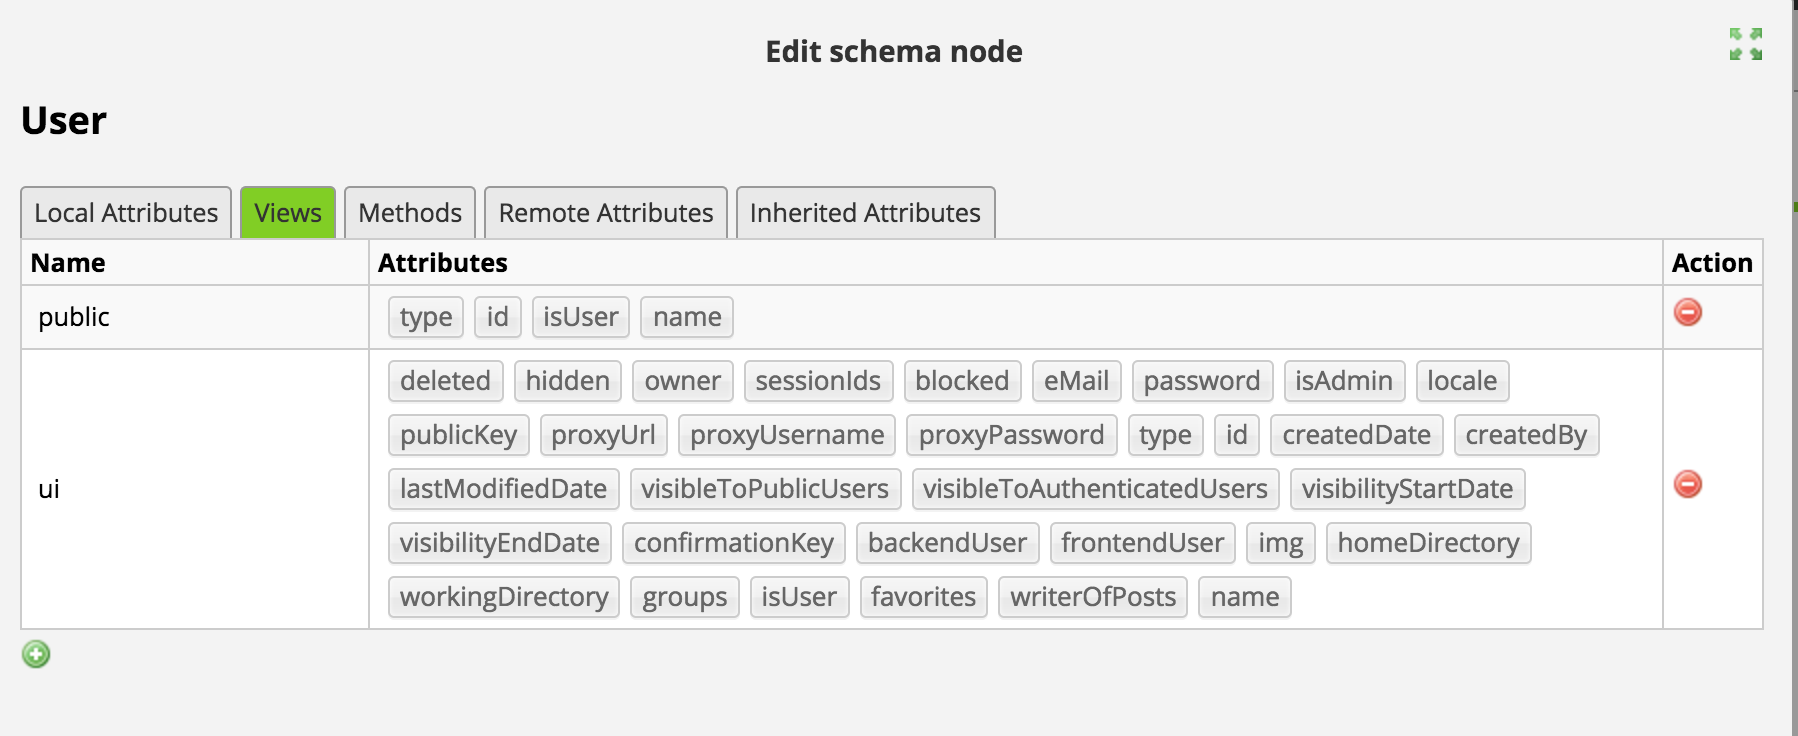
Navigate to the Schema tab and find User nodes in the main view. Select the pencil icon to inspect what properties users have, and verify both name and password already exist:
Create the Signup Form
Navigate to the Pages view and press the green + button to create a new page.
Click on the newly created tab to rename the page to signup.
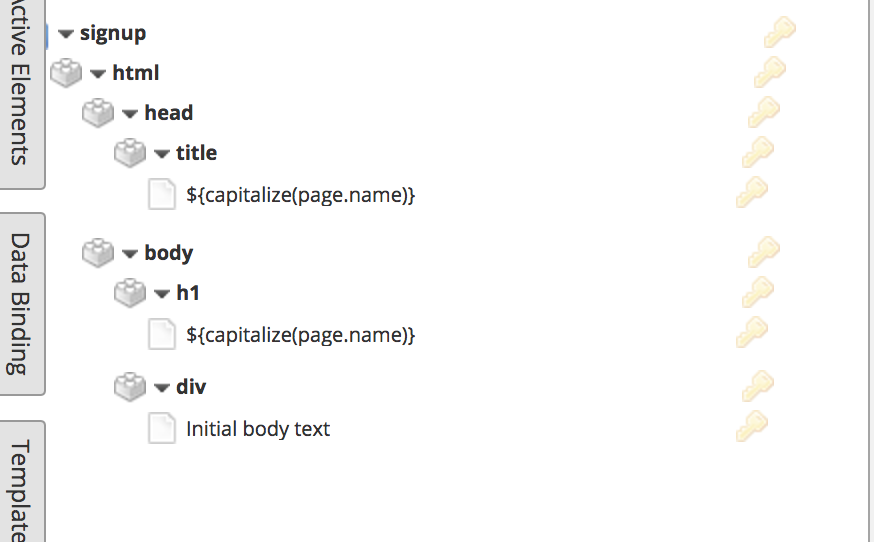
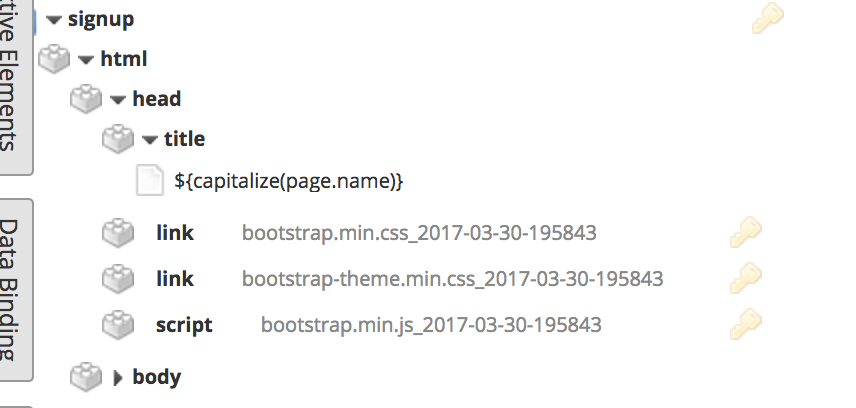
The new page should look like this in the Pages Tree View (the top tab on the left):
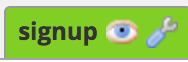
An eyeball icon should appear upon hovering over the signup tab in the main Pages view:
Click on the eyeball icon to see a preview of the page in your browser. Note: The app is only viewable from whichever user you logged in with admin permissions. To test public visibility, it’s best to use an incognito browser session to simulate a visitor.
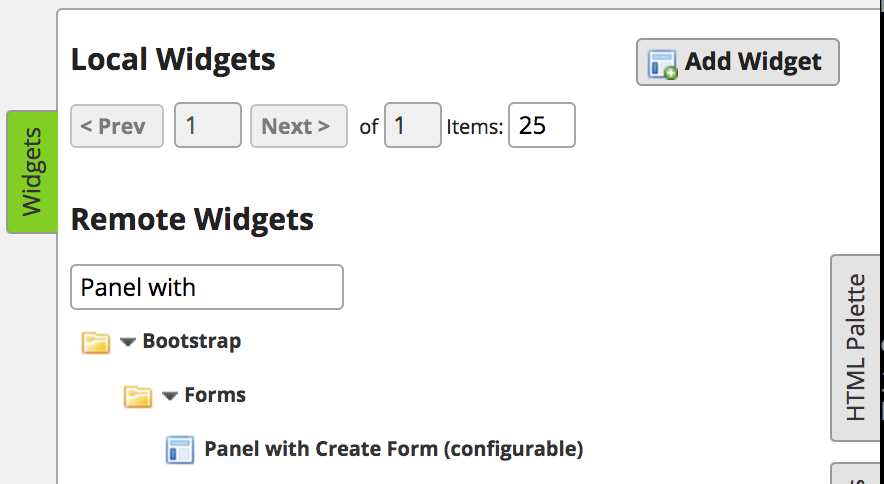
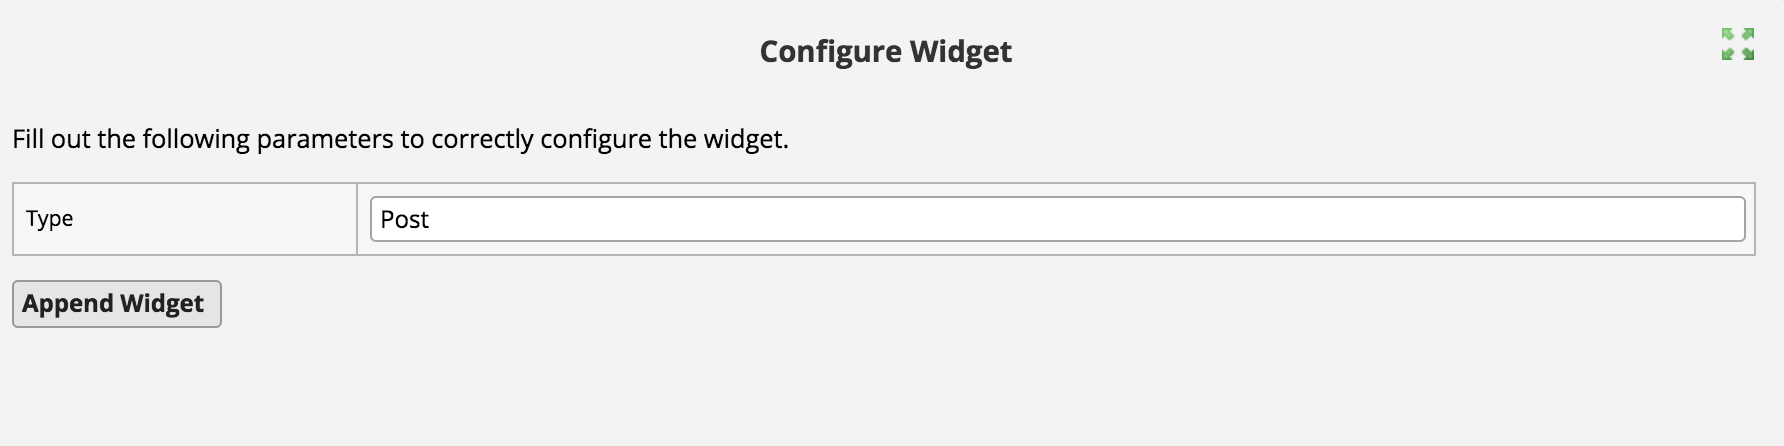
Open the Widgets menu (located in a tab on the right side of the screen) and find the Panel With Create Form widget, drag and drop it to your page. When prompted, configure the widget to create new User nodes, then tap Append Widget.
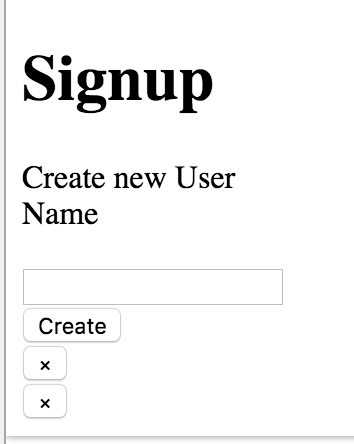
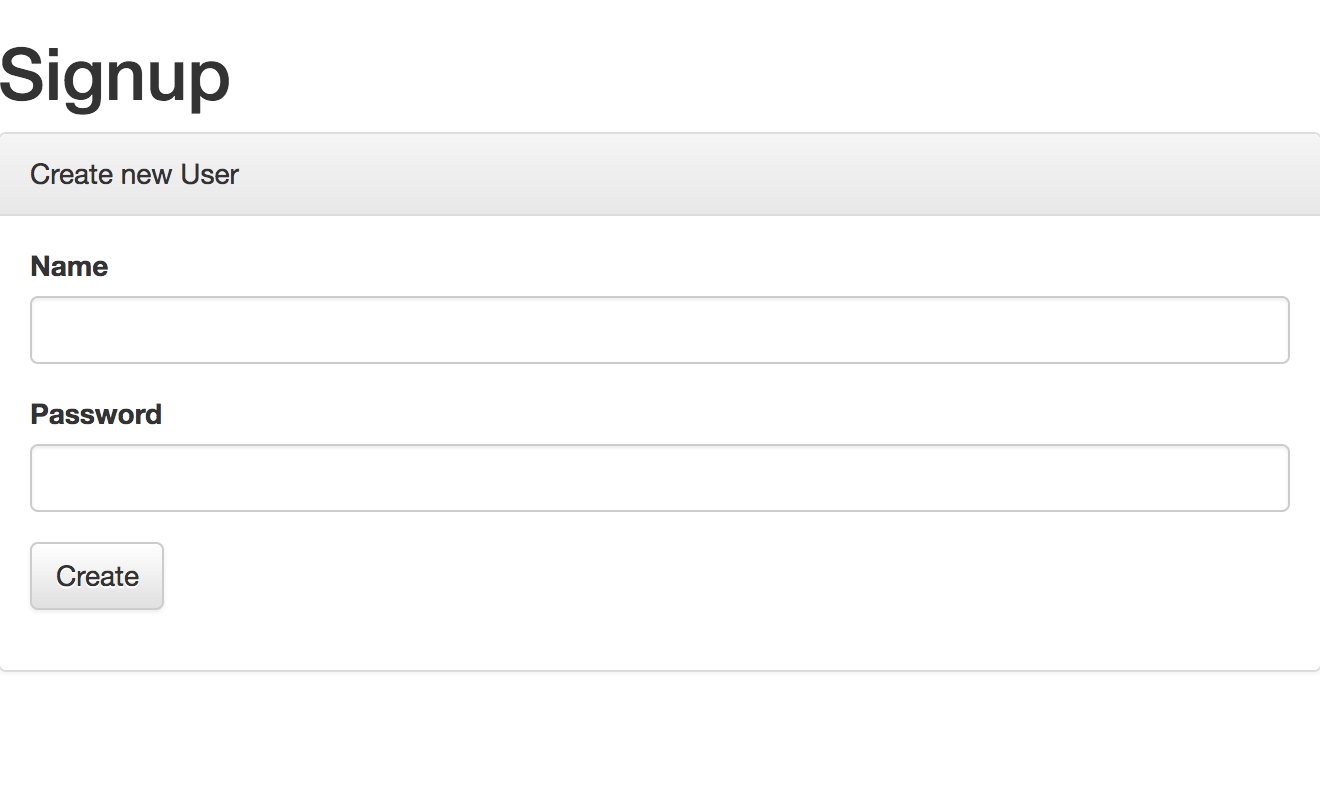
This is what the signup page should looks like so far:
Users will need passwords as well. Later, we’ll add a field for that in the Pages Tree View.
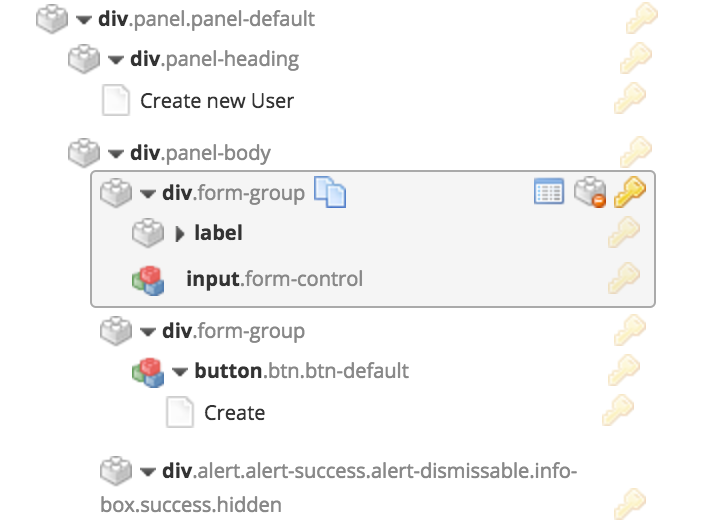
Select the div containing the name label and input. Press the clone-element icon to make a copy of the div. Move the copy underneath the original and delete the default “Initial body text” so the signup page looks like this:
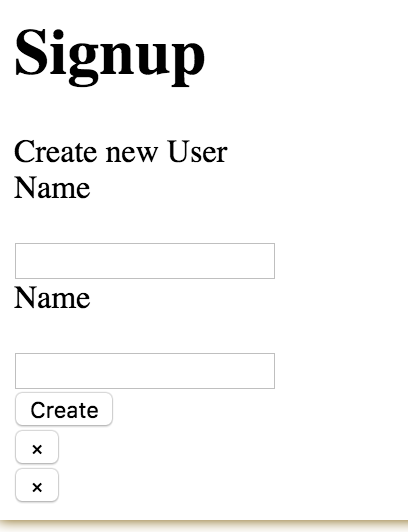
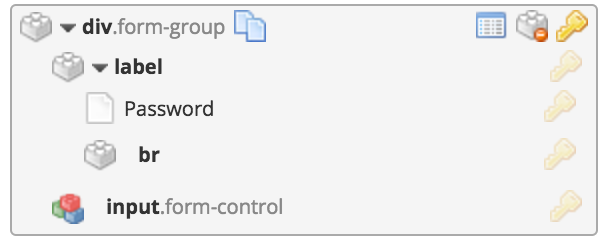
In the copied div, edit the label to refer to the User’s password by tapping “Name” and changing the text to “Password”.
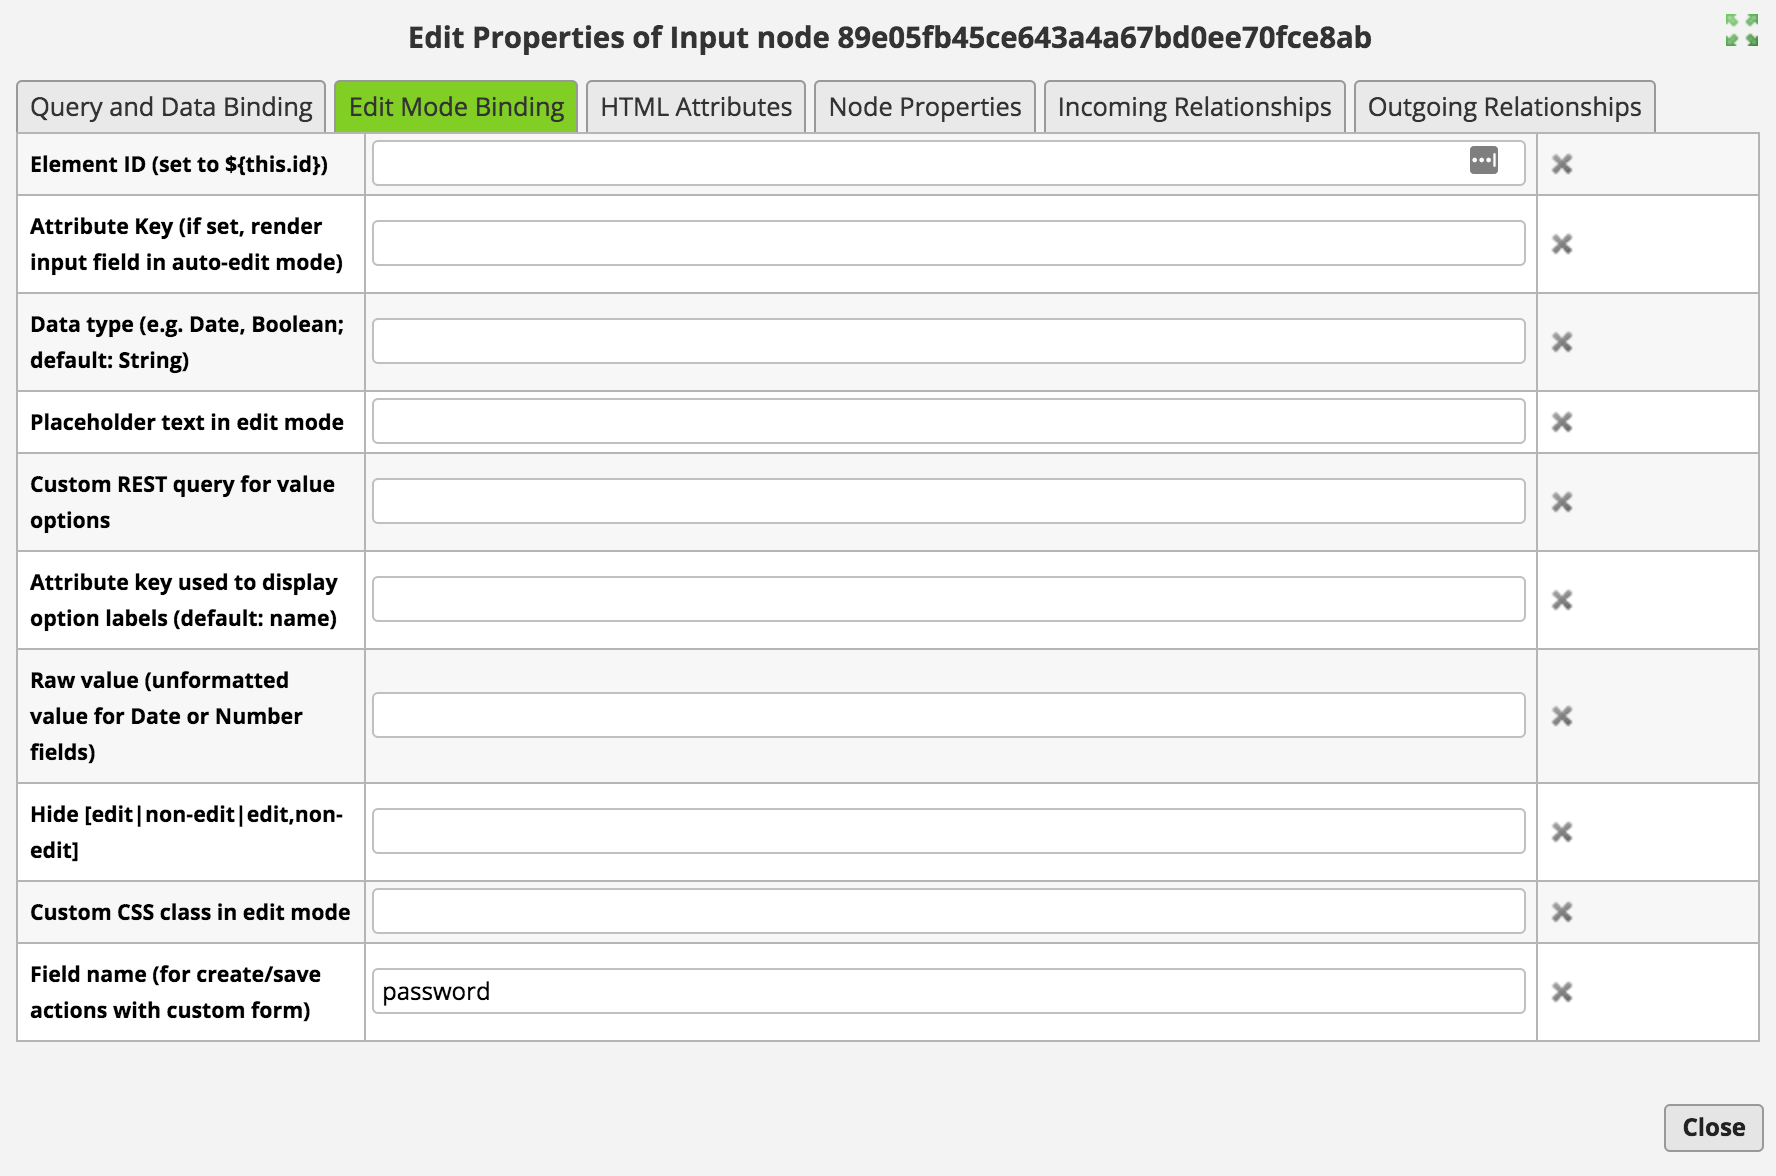
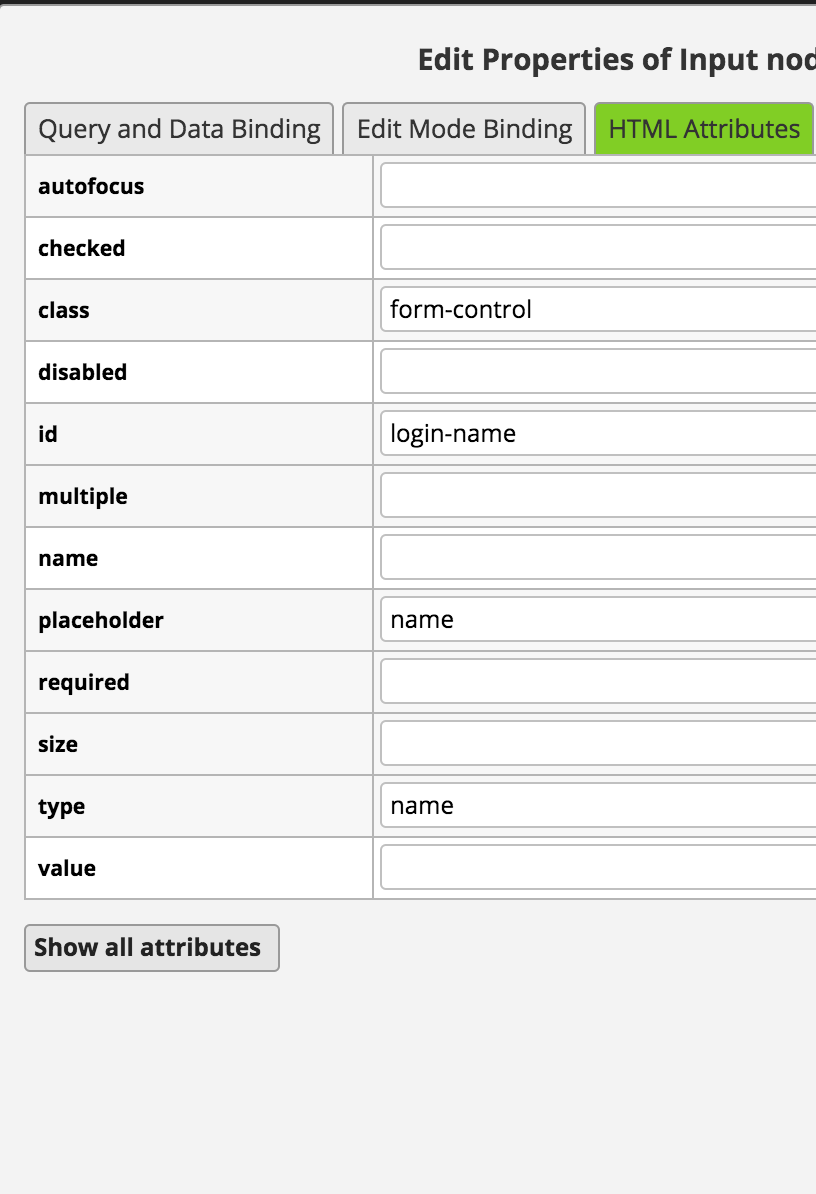
In the copied div, edit the input.form-control to refer to the User’s password by clicking the Edit Properties icon (third from the right) and changing the Field name to password.

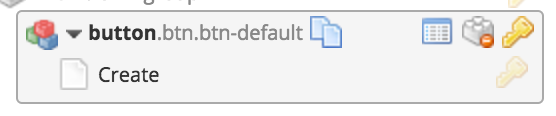
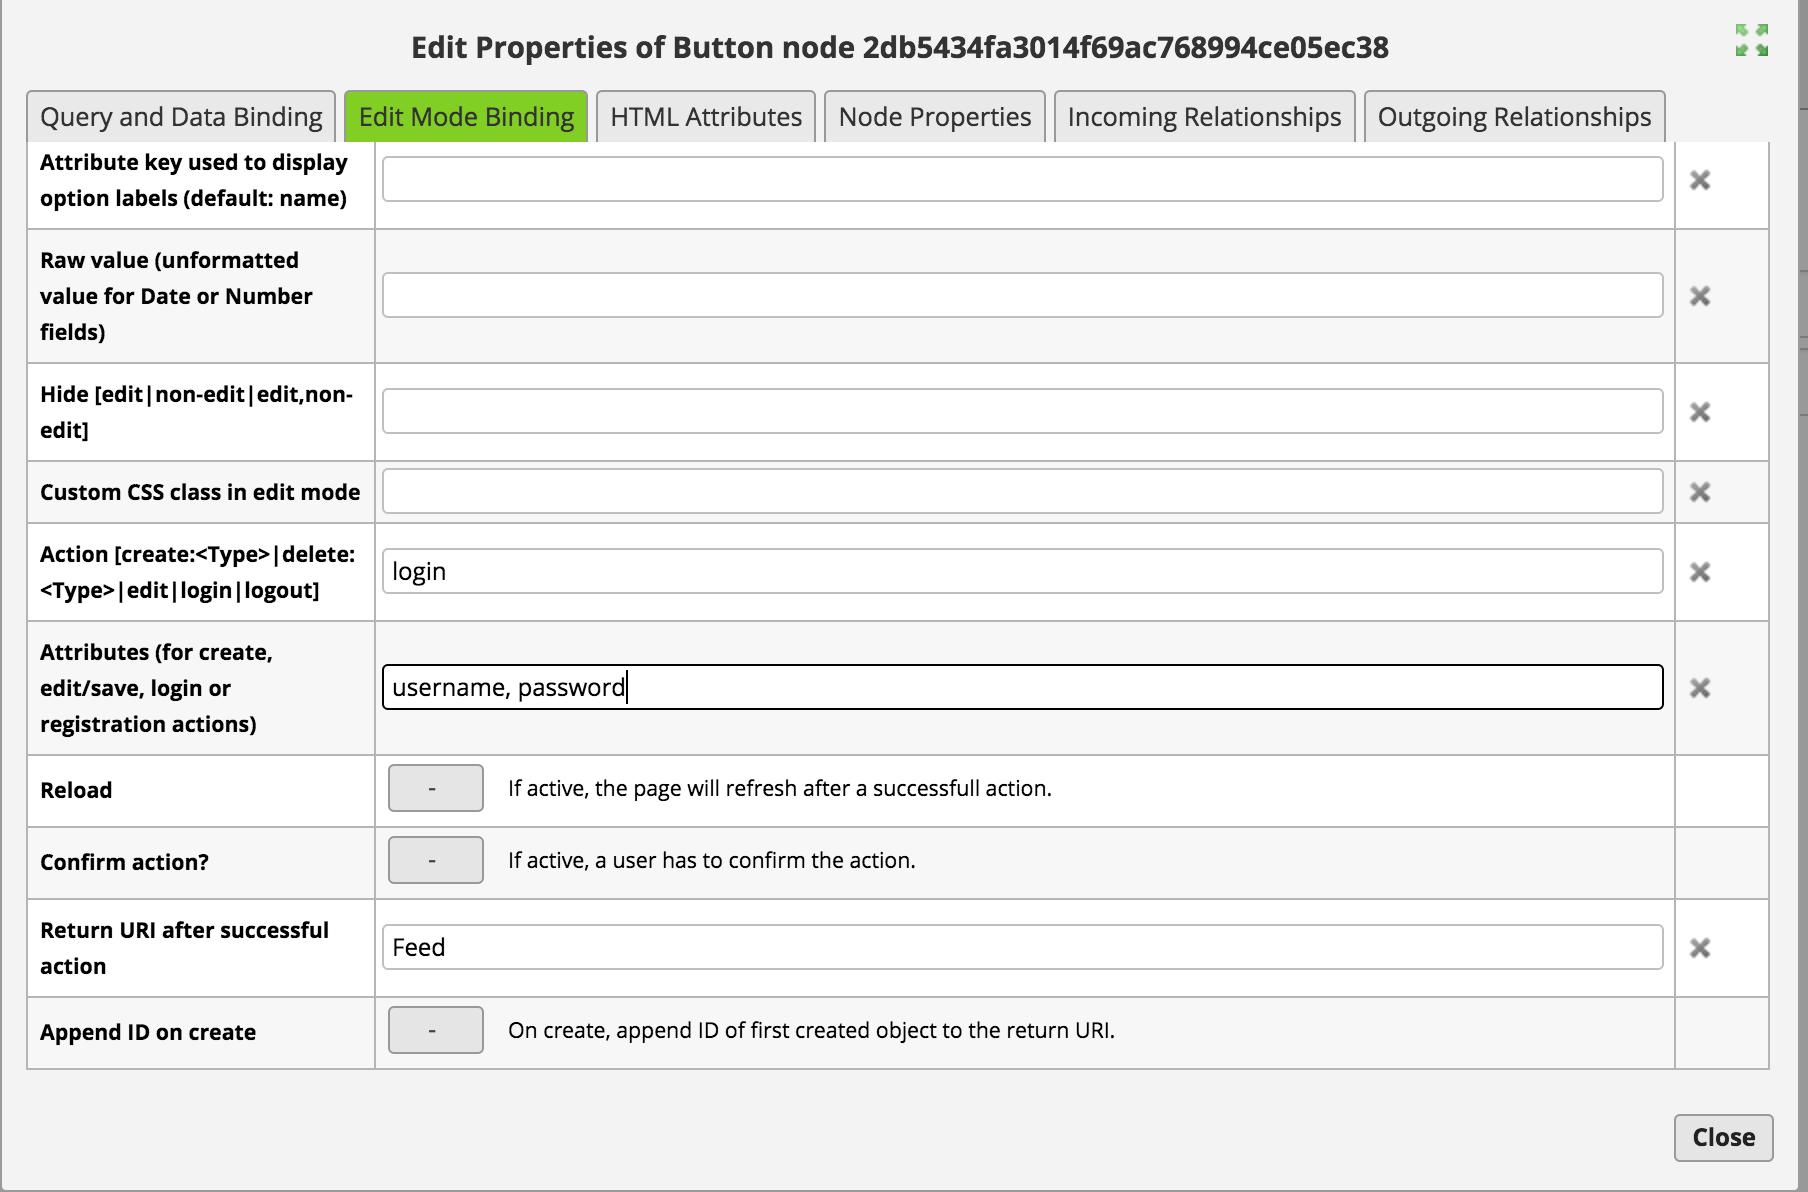
In order to save the new users with a name and password, update the Attributes of the Create button to include password:
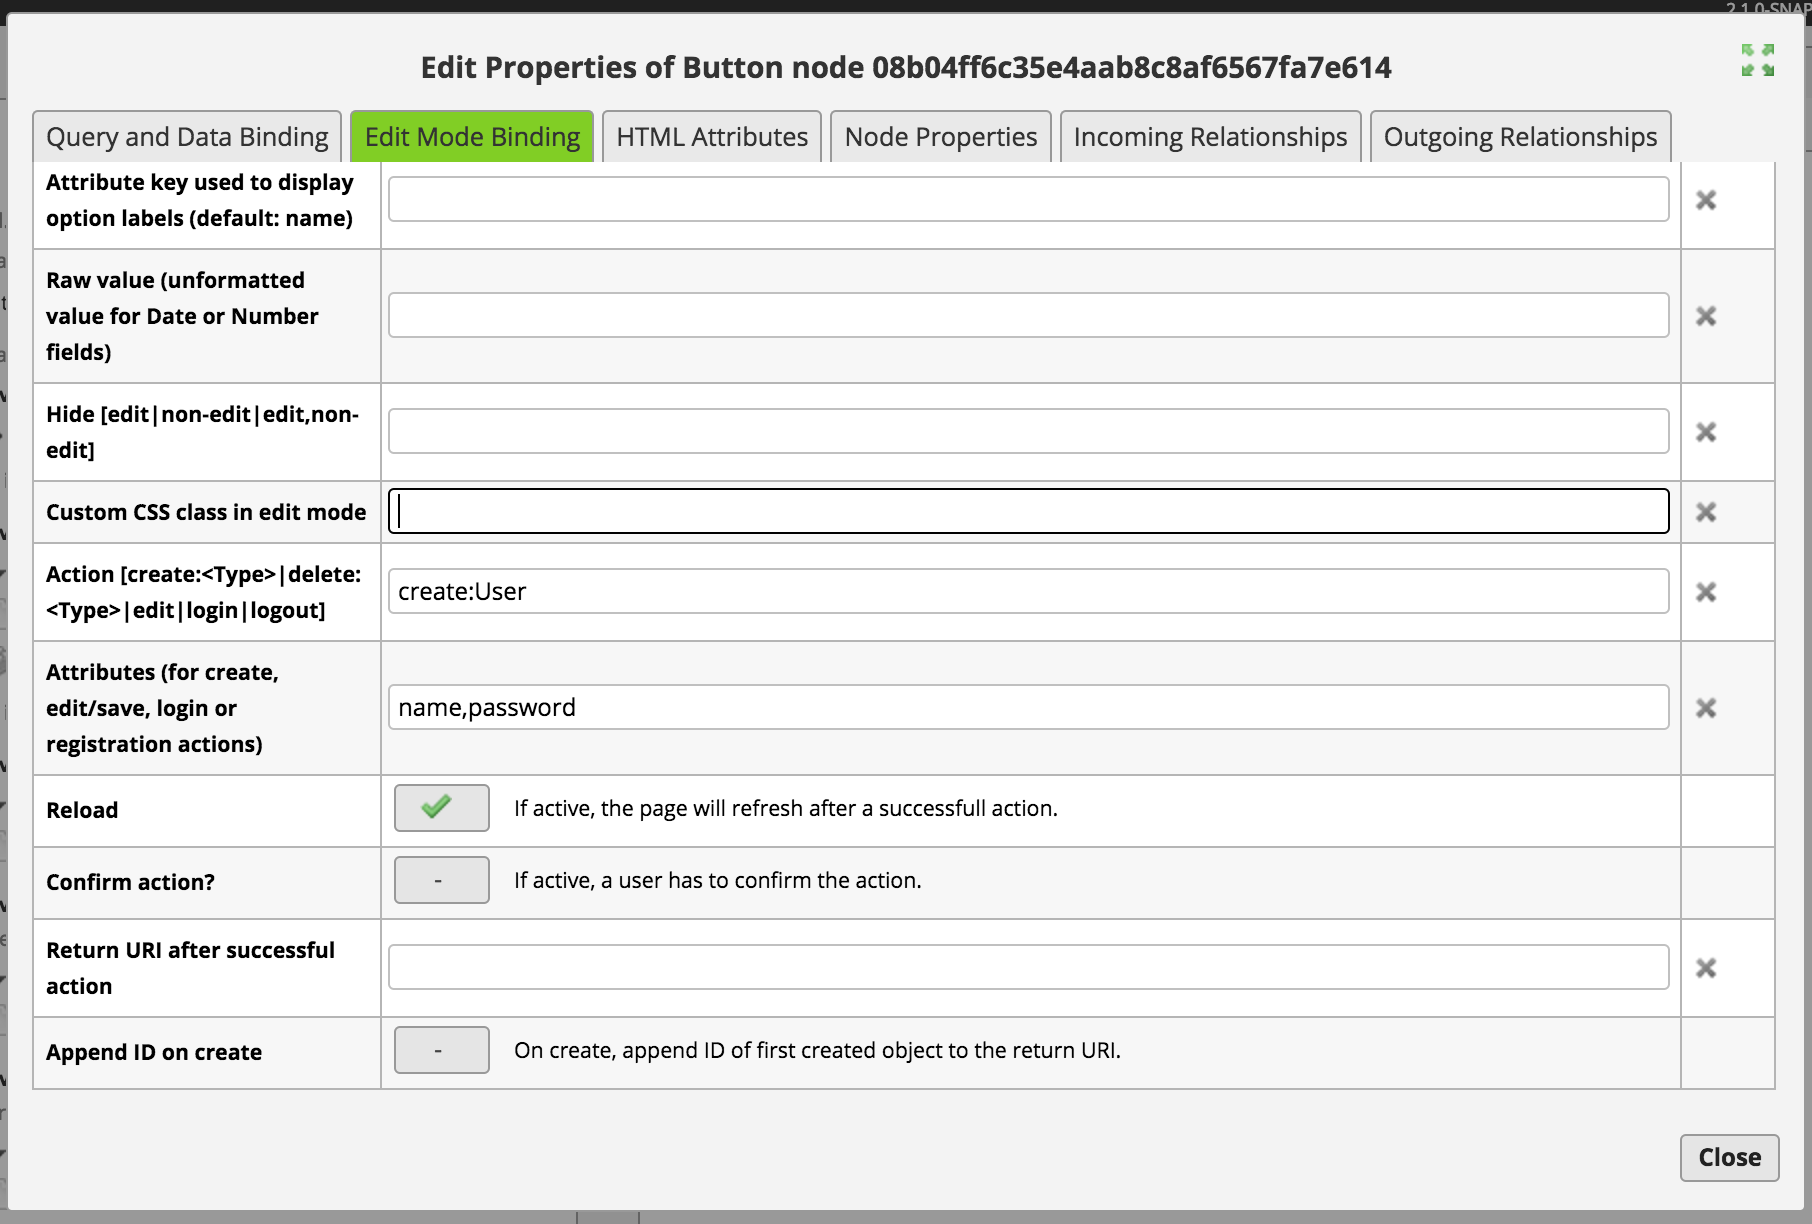
Check the Data
Click the preview eye icon and try to create a new user from the signup page.
After you enter a name and password, you should see your new user in the Data page of Structr.
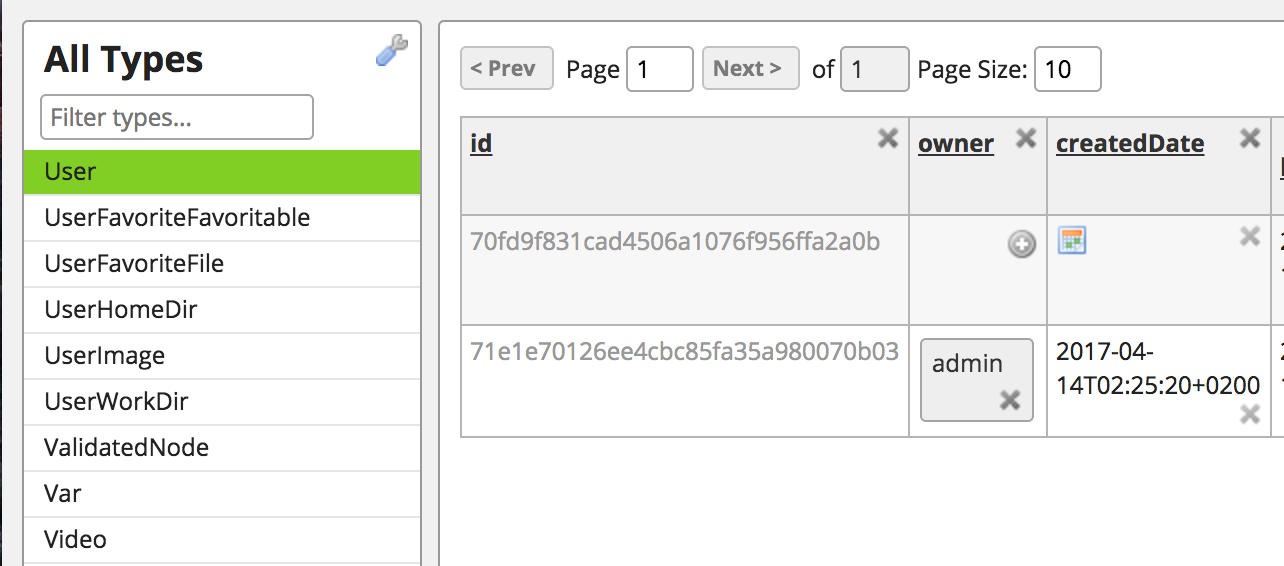
Now there are two users: admin and a new user created using the signup form.
Resource Access Grants
We want more than just authenticated admin users to be able to create new users. In fact, only unauthenticated users should be able to create Users. Open the signup page in an incognito window to test the create user functionality as a public user. The page should display a 404 error.
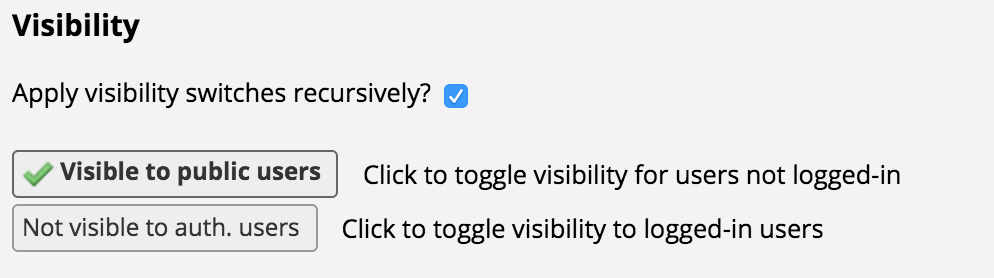
In the Pages Tree View, click the key icon to edit the Access Control and Visibility of the signup page

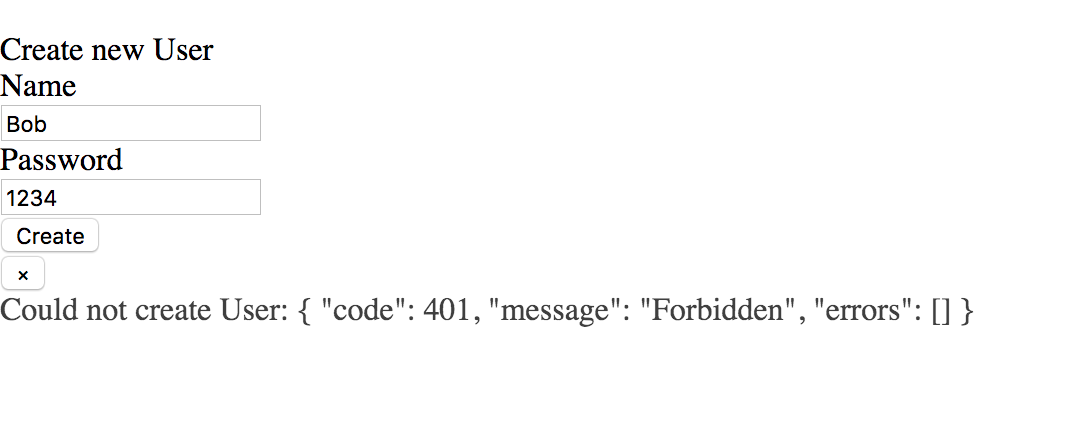
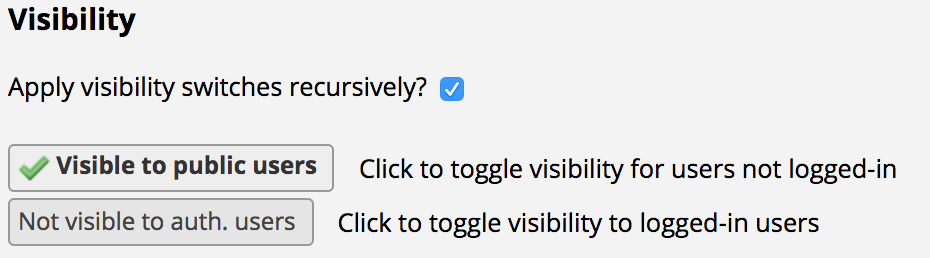
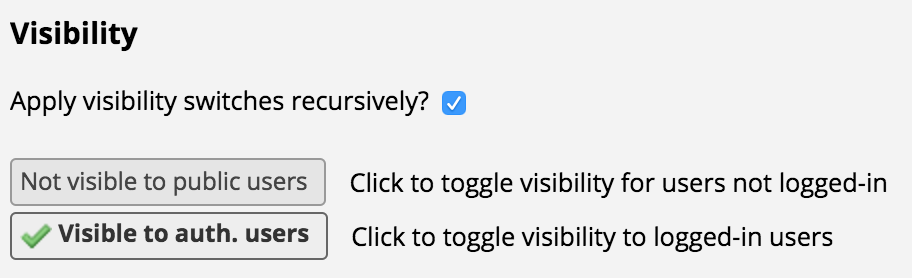
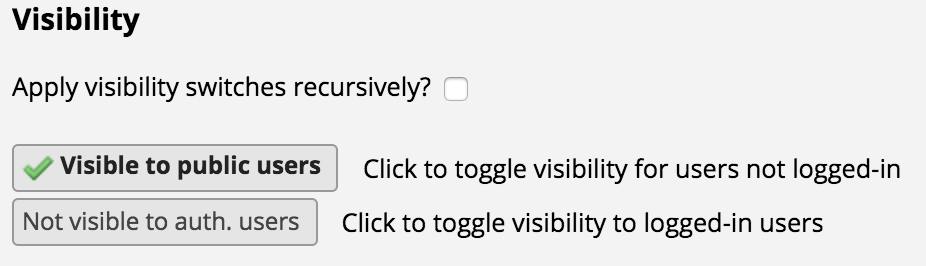
Check the Apply visibility switches recursively? checkbox then select Visible to public Users and try to load the page again.
You will run into a 401 error if you try to create a new User node:
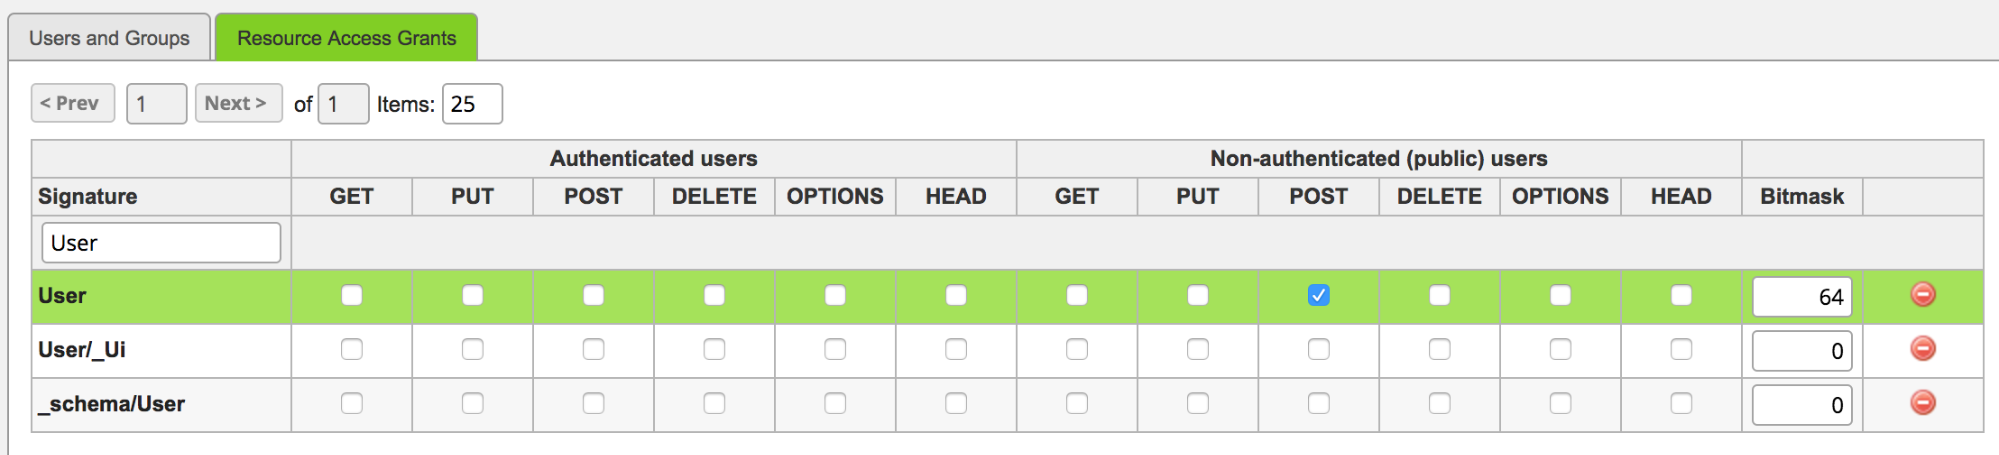
In the Security view, give unauthenticated users the ability create new User nodes using a POST request:
Try again, and verify a new user was created.
Add Bootstrap
Add some style by finding the Bootstrap widget and drag it into your page’s head:

Repeat the Resource Access Grants step described above (open the menu by tapping the key on signup page row) to grant unauthenticated users the right to view the styling and enjoy your new signup page:
Login
Now that we can create users, we would like to log in using name and password.
Back to the checklist:
- Pages: Users will have to use a login page to login
- Security: Only public users should be able to see the UI or login
- Schema: We know Users already exist because we created some in the last step
- Data: Logging in will not significantly alter any data
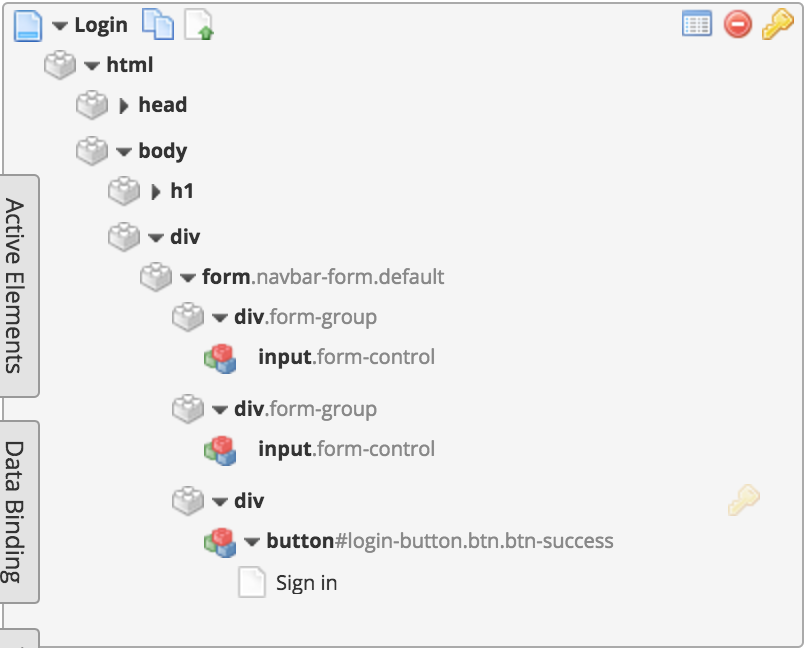
Create the UI and Functionality
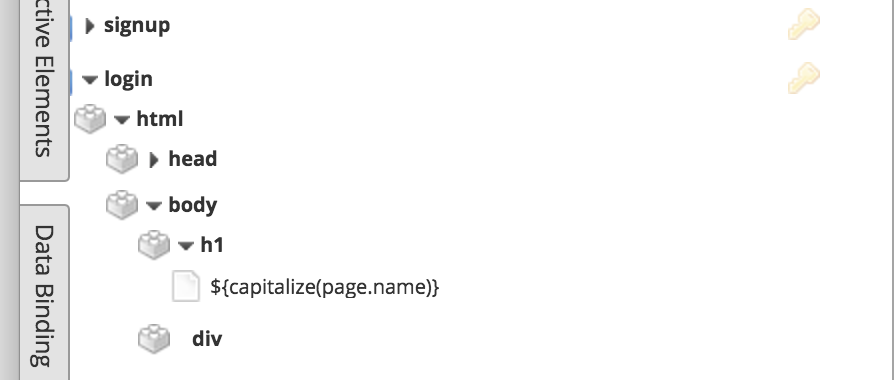
Create a new page called login. You can create it from scratch or clone the already-existing Signup page and delete the create user form to save time setting up Bootstrap and access controls. To clone the signup page, tap the clone icon, which is the icon immediately to the right of the page name in the Pages Tree View.
From the Widget library, drag a Login Form widget (under Bootstrap > Generic) into the page, and edit it to use name instead of email.

Security
Preview the page in an incognito browser and test using both valid and invalid credentials.
Recursively re-toggle the access control access control settings for the login page so your non-admin user can view the new widget: tap the pages’ key icon, select Apply visibility switches recursively? and deselect then reselect Visible to public users.
Open the login page in an incognito browser and try to log in. You’ll get a “Wrong username or password.” message even though your credentials are correct. If you check the console or terminal you’re using to run Structr, you’ll find this message:
INFO org.structr.web.auth.UiAuthenticator - No resource access grant found for signature _login. (URI: /structr/rest/login)
To fix this, add a signature called _login on the Security page.

Filter for this new signature and give public users the rights to POST to it.

Try to log in again and keep an eye on the console.
When you log in successfully, you’ll see
INFO o.structr.web.resource.LoginResource - Login successful: bc6811eef0dc43408e3b30fb3a3e4931
Try to log in twice in a row and observe you’ll see
org.structr.web.auth.UiAuthenticator - Resource access grant found for signature _login, but method POST not allowed for authenticated users.
Signup and Login: Loose Ends
Before continuing, let’s address some loose ends that have built up over the first half of this tutorial:
- On signup, users should be redirected to the login page
- On login, users should be redirected to the feed page that will be created soon
- Public users should be able to navigate to the login page from the signup page and vice versa
Redirect users on login and signup
On the login and signup buttons, go to the Edit Properties > Edit Mode Binding menu, and enter the path to the target page ( /feed for login and /login for signup) in the Return URI after successful action field.
Add basic navigation
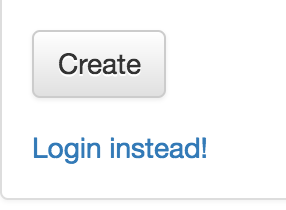
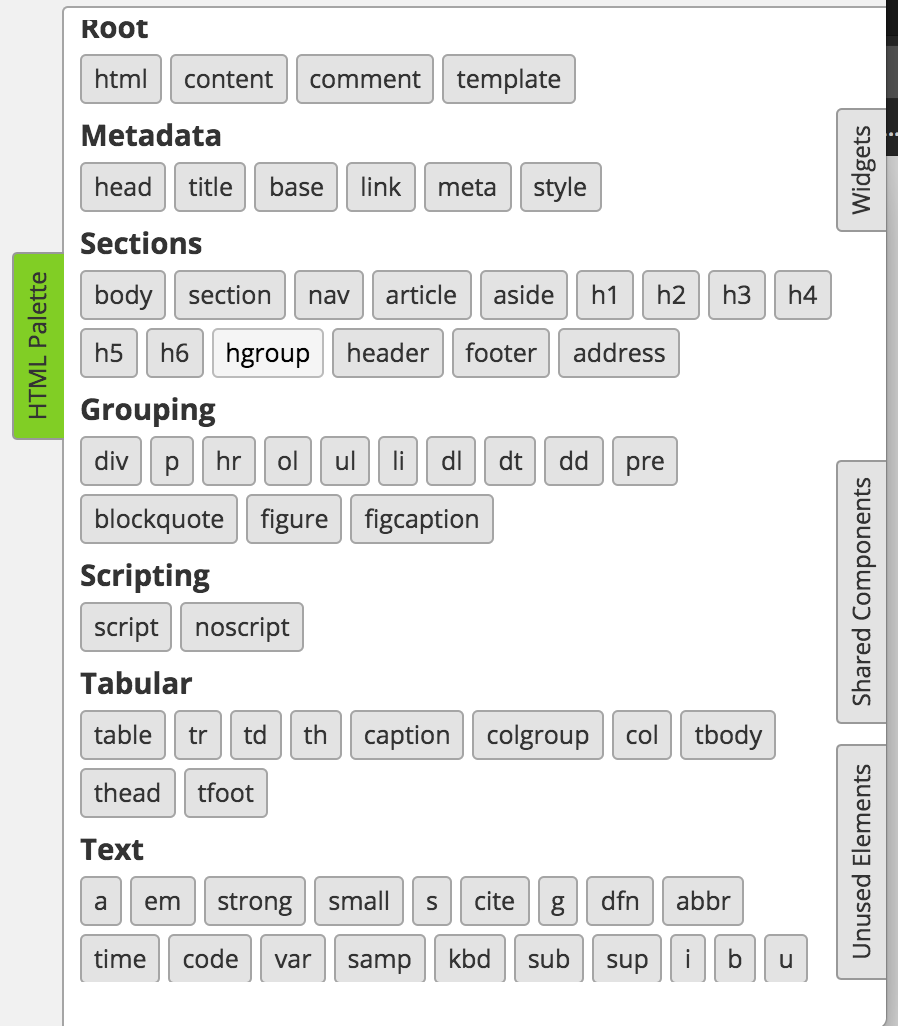
For the sake of improving the testing experience, open the HTML Palette and drag some a elements to the signup and login pages to be able to easily navigate from one page to the other without having to type in the URL.
For example, in the signup page, you may want a link that says “Login instead!”

Public Feed
As a public or authenticated user, I can see a feed of all the posts currently in the application, sorted earliest-first.
Back to the checklist
- Schema: Posts should exist to populate the feed, and have a WRITER_OF relationship with their author
- Data: Admin will have to be able to create test Posts to populate the feed
- Pages: UI for the feed should exist on its own page, displaying Post title, author, created date, and body
- Security: Both public and authenticated users can should be able to see the feed and posts in the feed
Schema
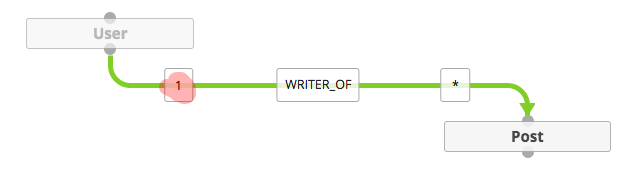
In the Schema tab, add a Post node and a WRITER_OF relationship, as described in the image below. To create a relationship, tap on the anchor (circle on the edge of the the start node rectangle) and drag the green arrow to a circle on the edge of the end node rectangle.

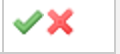
Add body and title properties to the Post nodes. Save by adding the green checkmark under “Action”
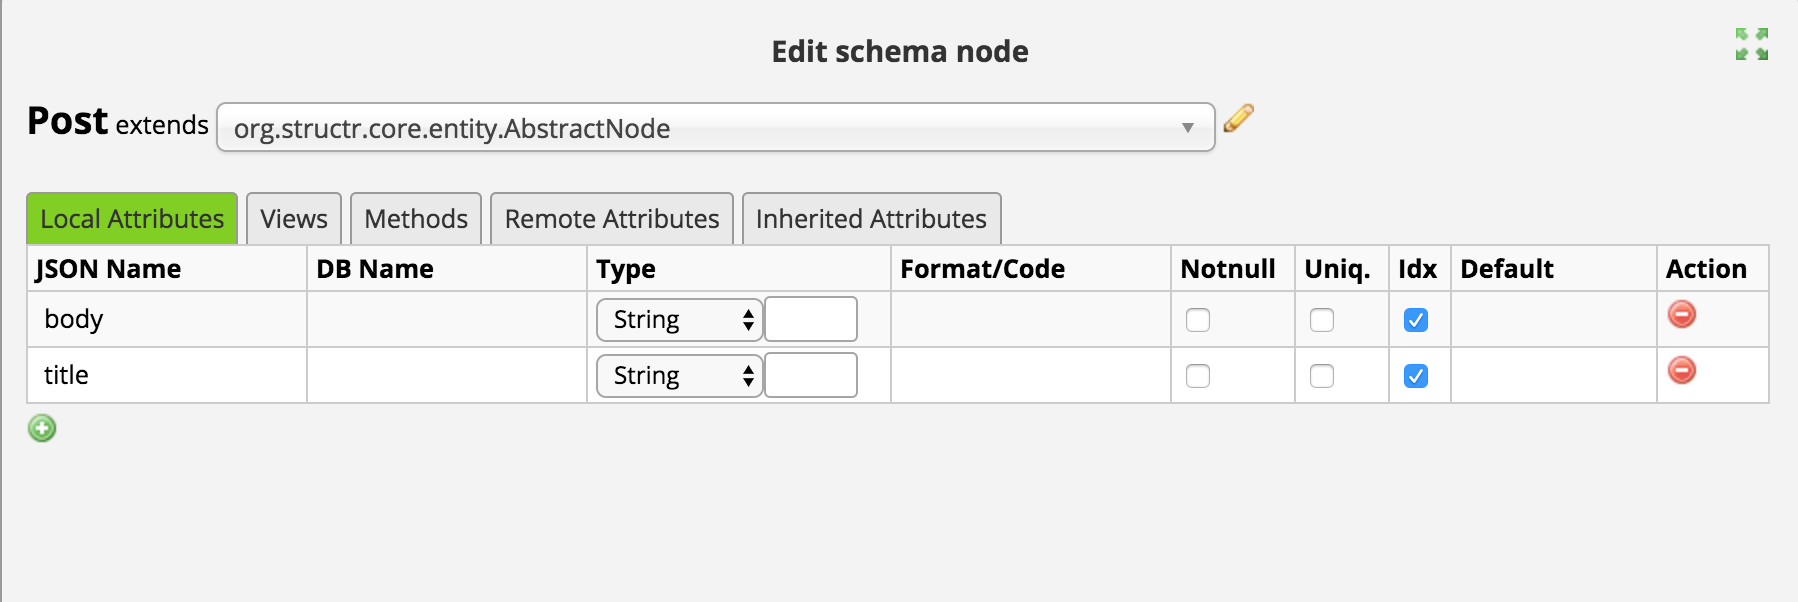
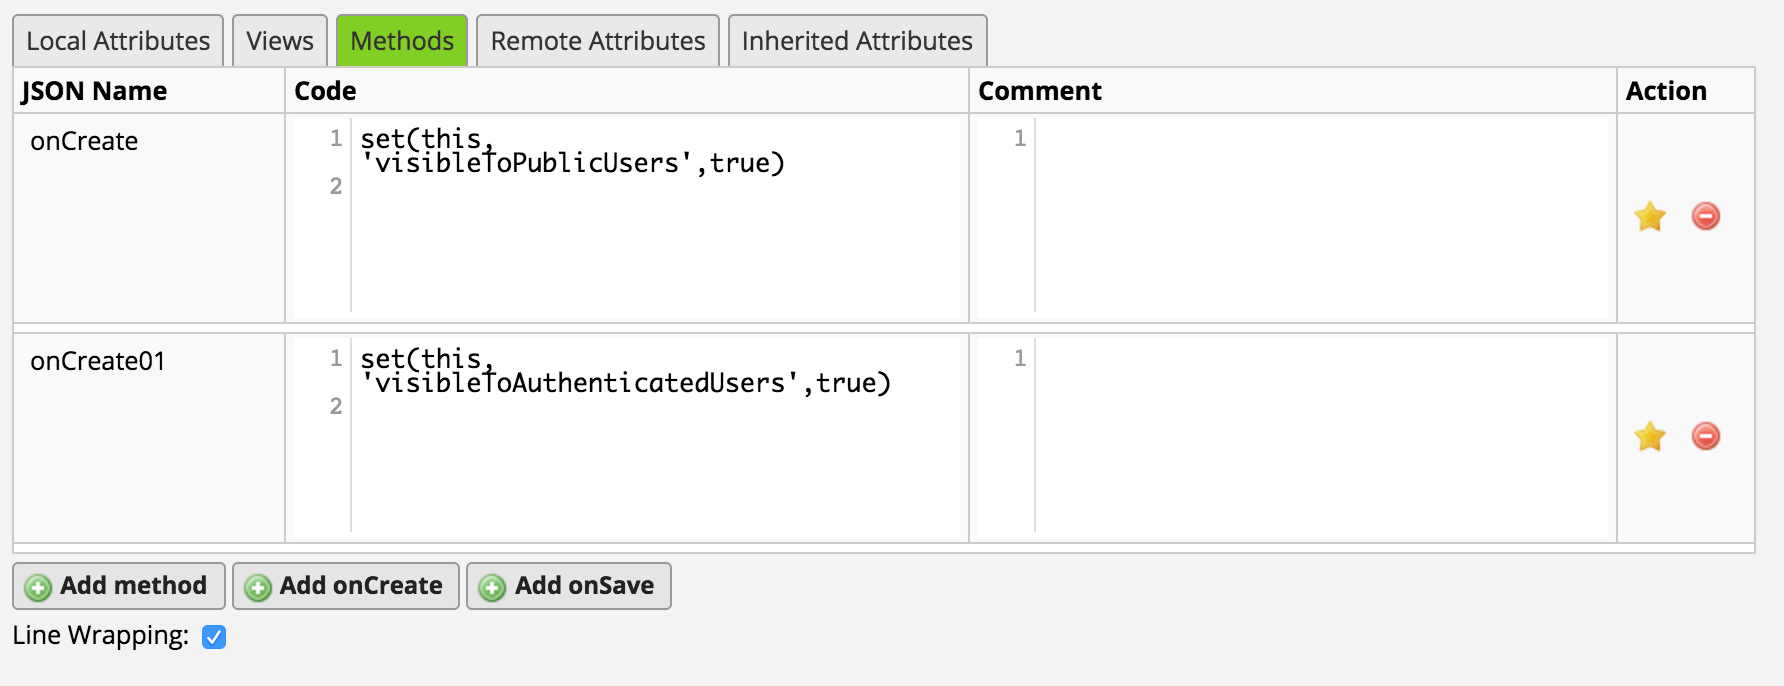
Make Post nodes visible to public and authenticated users using some onCreate functions. Tap the “Add onCreate” button to add two onCreate-type functions as below:
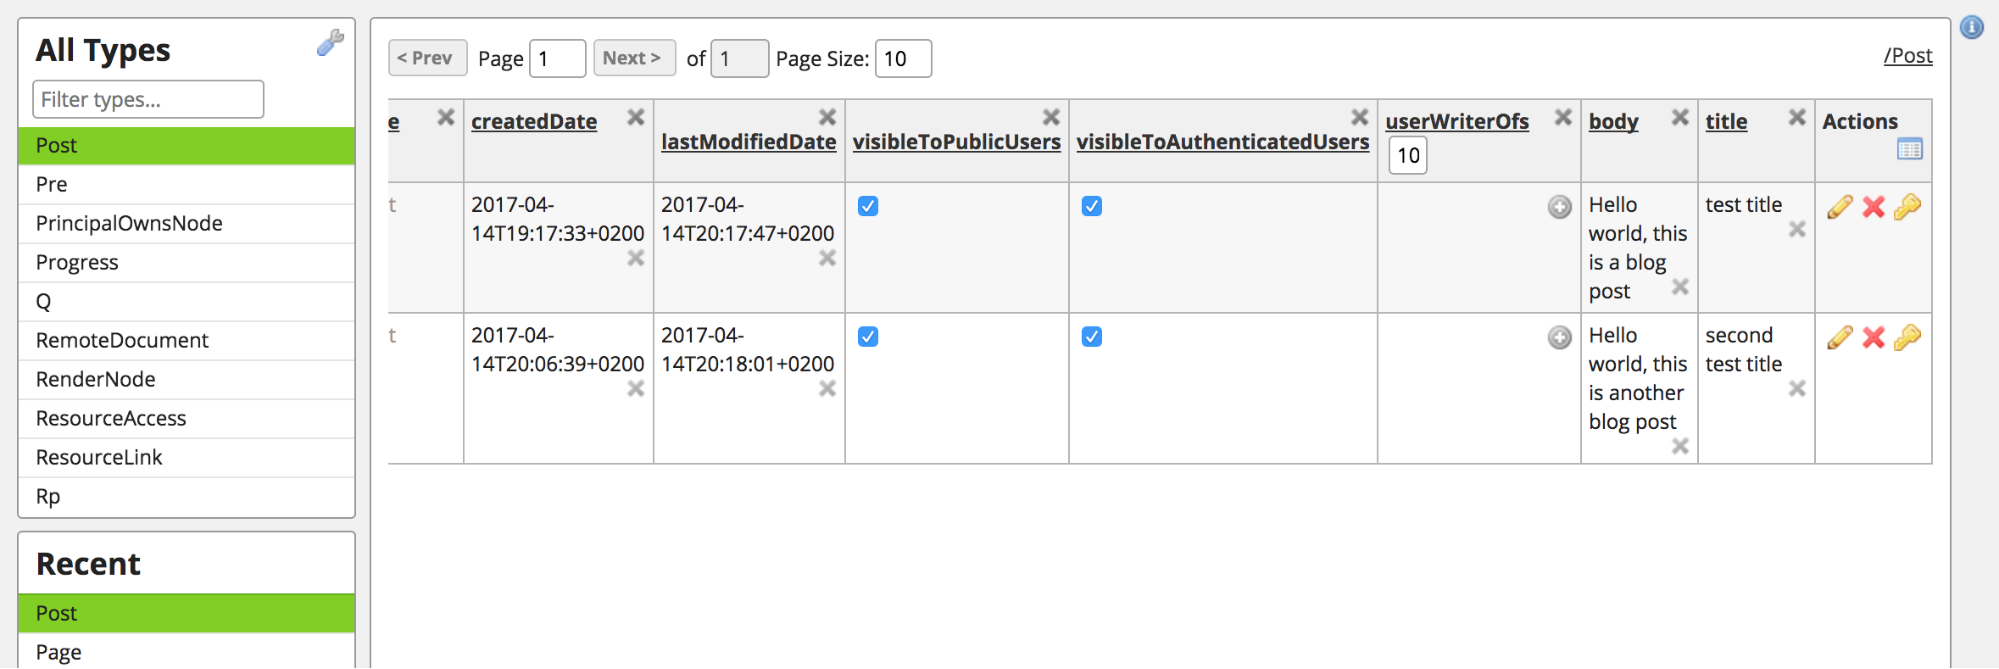
Check that the data is appearing as expected by creating new Post nodes on the Data tab:

Hint: Don’t forget to save the local attributes using the little green checkmark.
Data
Since there is no way to create new Post nodes via the UI, use the Structr admin to create some additional test Posts. Add relationships between Users and Posts by creating new UserWRITER_OFPost instances.
Hint: Don’t forget to fill out the title and body fields.
Pages
Create the feed page
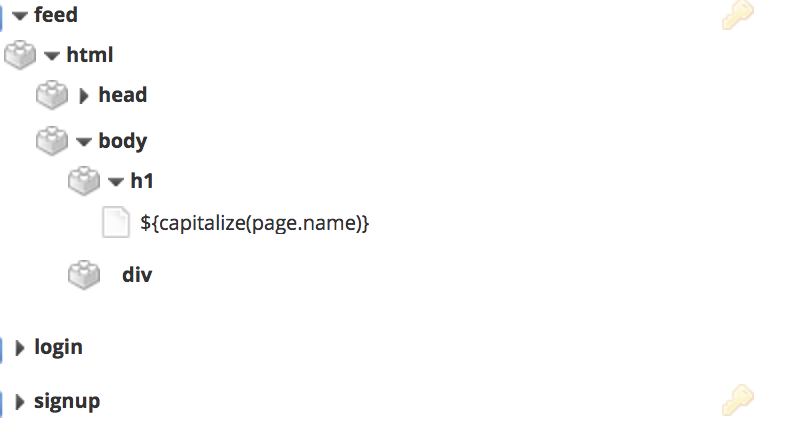
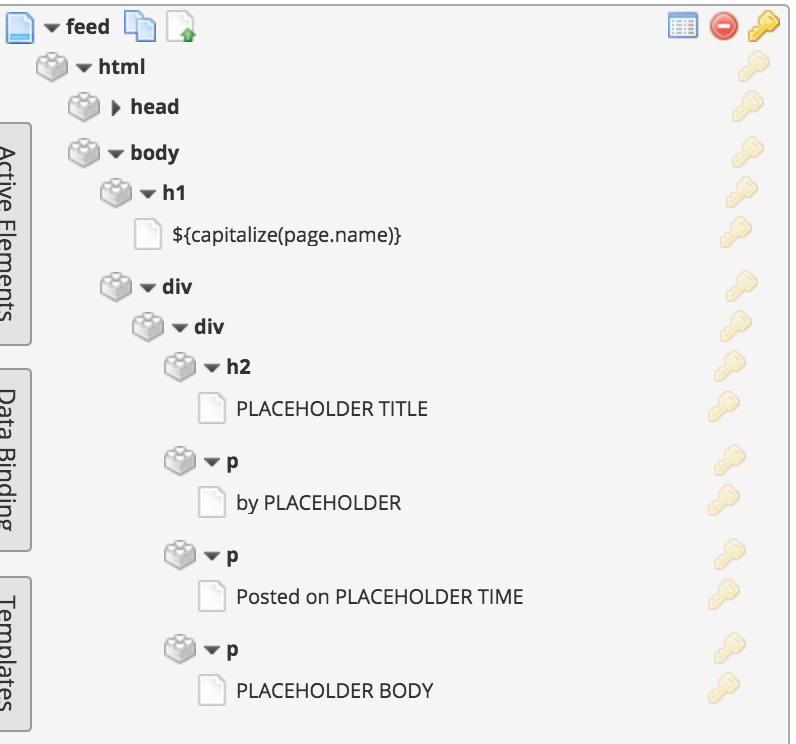
Copy the signup page, delete the signup portion, and label the new page feed. This is what the page should look like before you add any feed-specific elements:
Open the HTML Palette on the right hand side to drag in grab HTML elements as needed.
The intermediate Post element might look something like this:
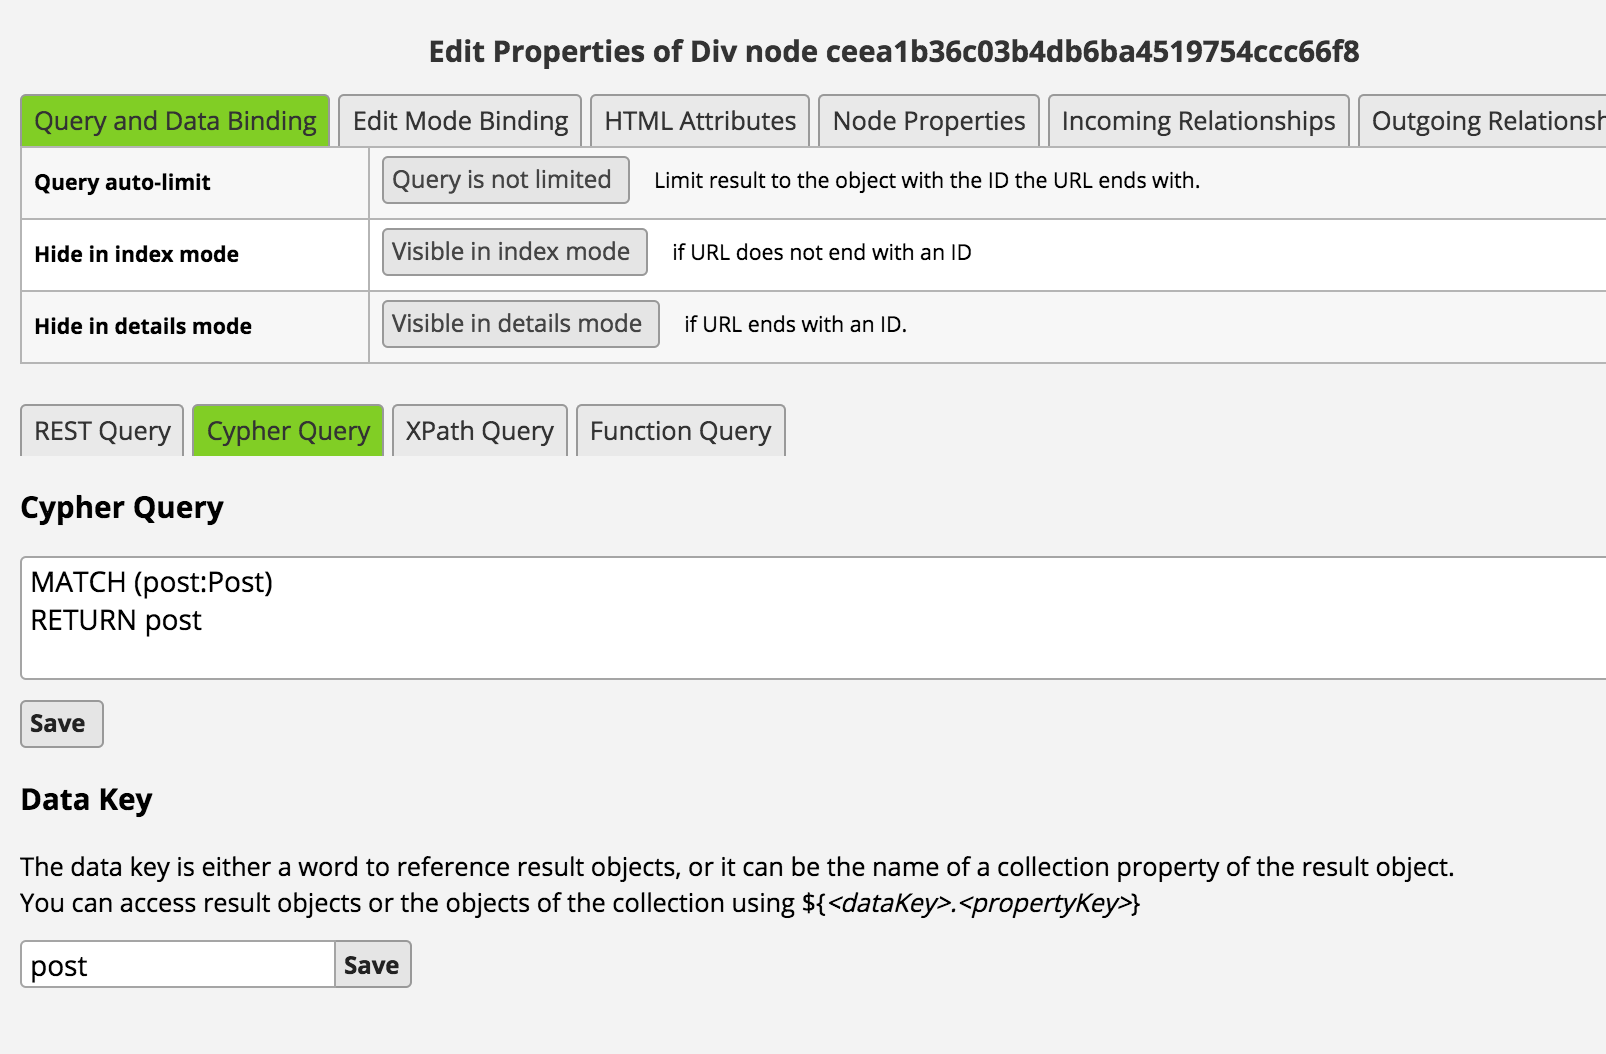
Tap on the Edit Properties icon of the Post’s parent div and add a Cypher query to populate the feed.
Cypher Query:
MATCH (post:Post)
RETURN post
Data Key:
post
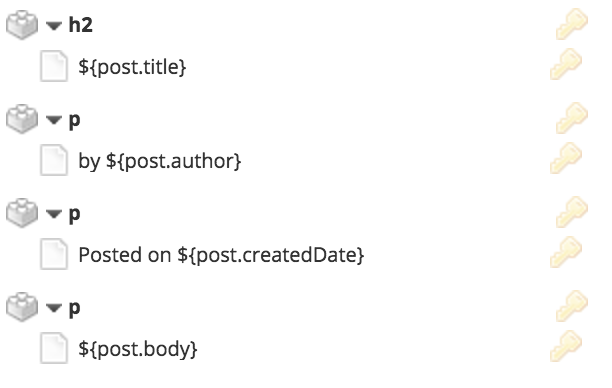
To use the data, replace placeholders as following:
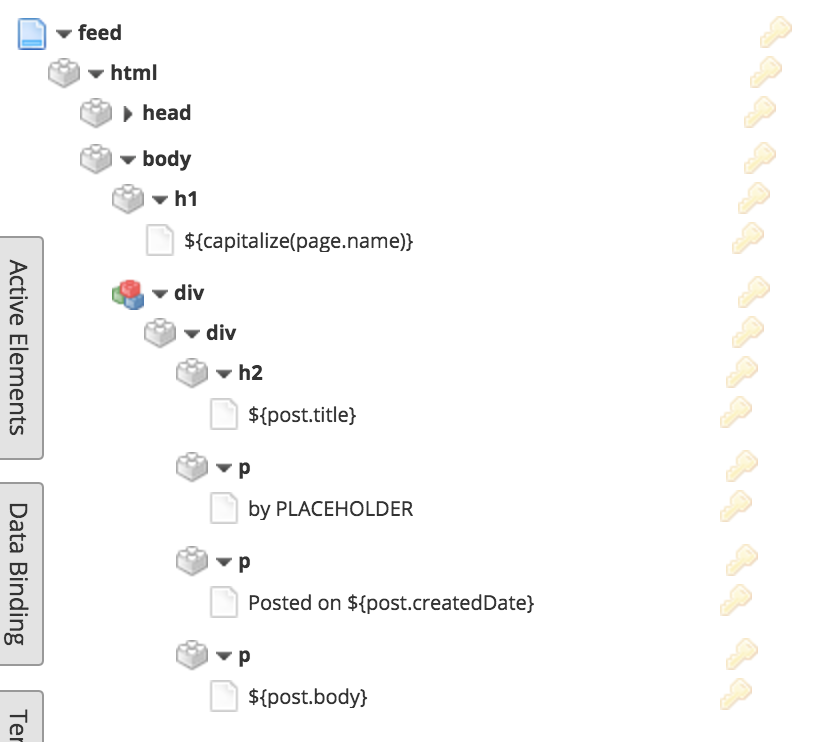
Notice that the Post’s author is not filled in, since author isn’t a property of Post.
Sidebar: Preventing future loose end
Before continuing, you might consider adding a logout button and a way know what user you’re logged in as. This will be helpful when you are creating blog posts as a non-admin user a bit further down in the tutorial.
Grab a Logout button (configurable) from the Widget menu and drag it to an easy-to-manage place on your feed view. Make the logout button visible only to authenticated users, and add a signature called _logout on the Security page.
*Hint: Don’t forget to give authenticated users the permission to POST on _logout.
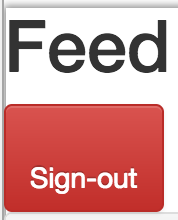
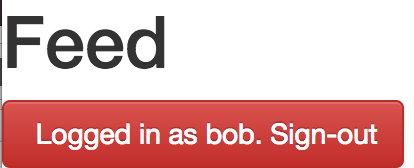
Display your current user’s name by changing the text of the button to:
Logged in as ${me.name}. Sign out.
For example, if you’ve logged in as user bob:
Display post author
Feed items should each display:
- Post title
- Post body
- Post author
- Post creation date
The current Posts have most of these elements, but are missing the authors of the Posts. Prepare the query the feed will use to populate Post items with author bylines, and test it using the built-in Cypher console, which opens with CTRL+ALT+C > SHIFT + TAB.
MATCH (post:Post)<-[]-(user:User) RETURN {title:post.title, body:post.body, createdDate:post.createdDate, author:user.name} AS post ORDER BY post.createdDate DESC LIMIT 10; //limit for the sake of the Cypher console, remove in the app itself
CTRL+ALT+C (or CTRL+SHIFT+C)
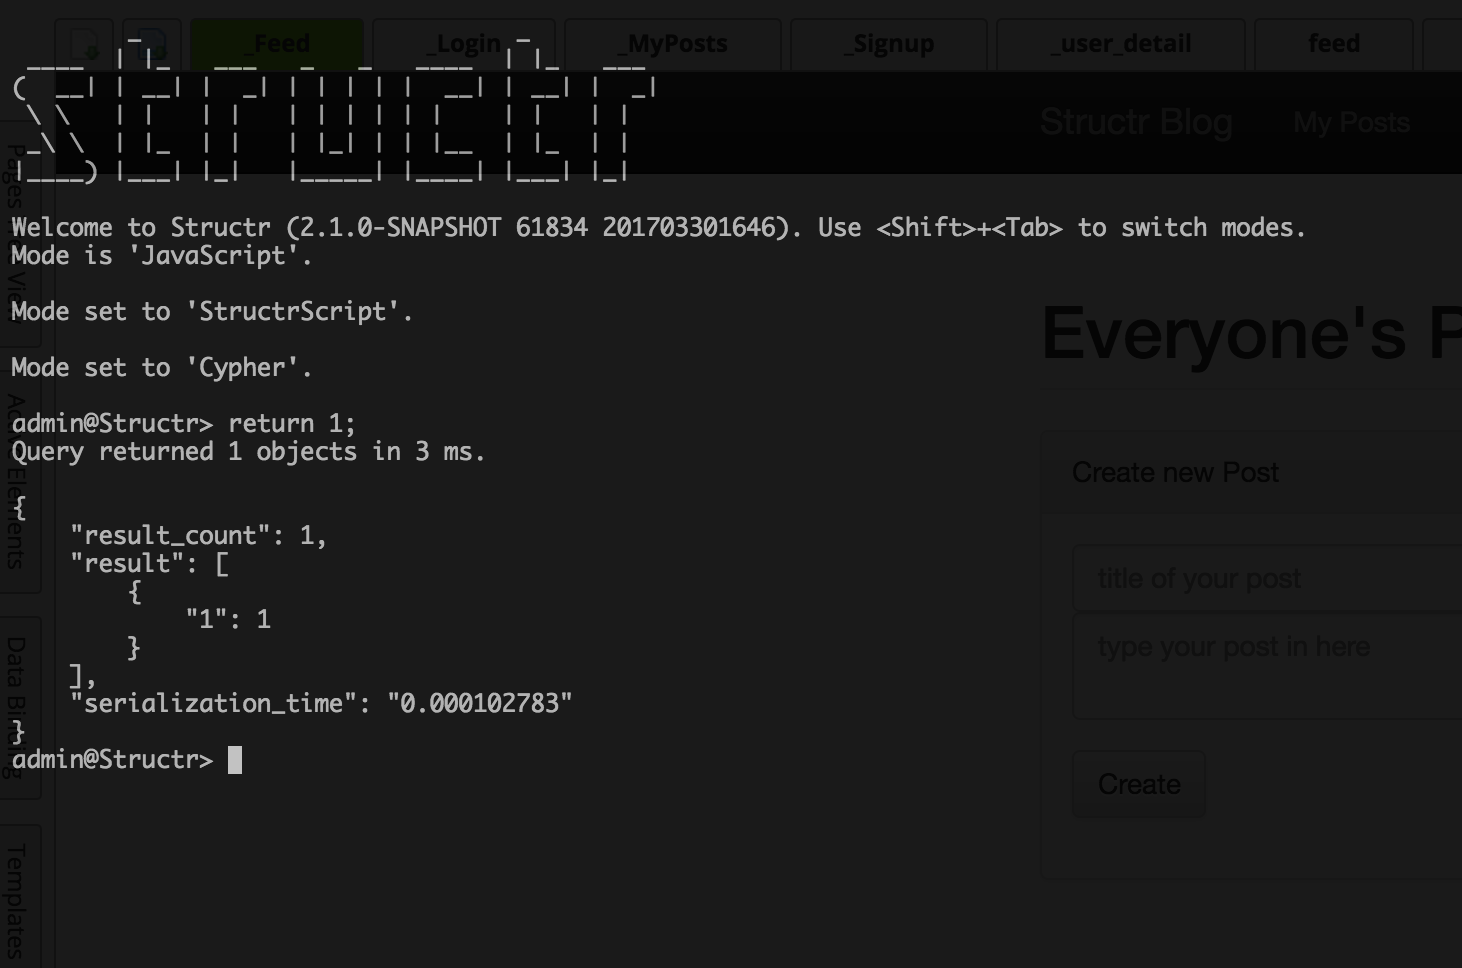
SHIFT + TAB to reach the Cypher console
Open the Post div and paste the updated query, removing the LIMIT 10
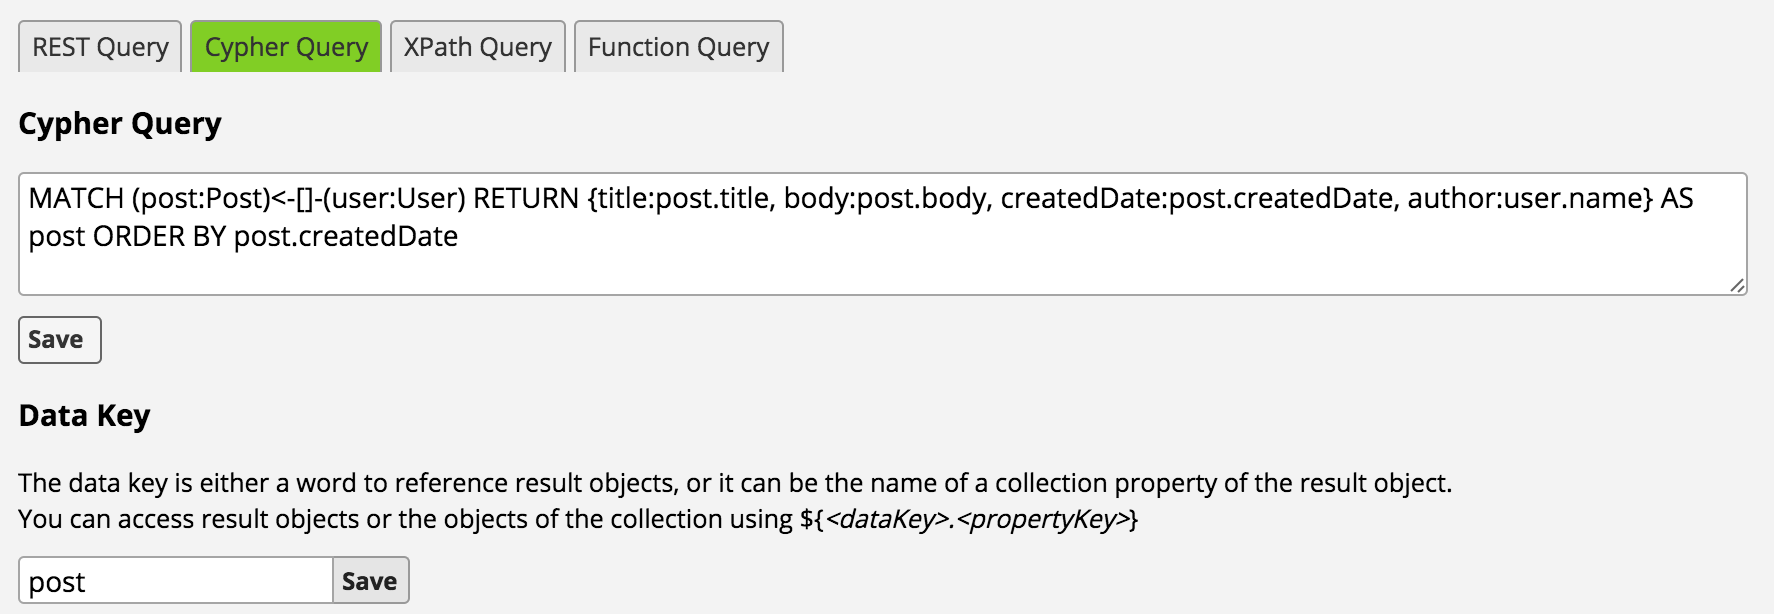
Update the author placeholder to by ${post.author} and take a look at your posts:
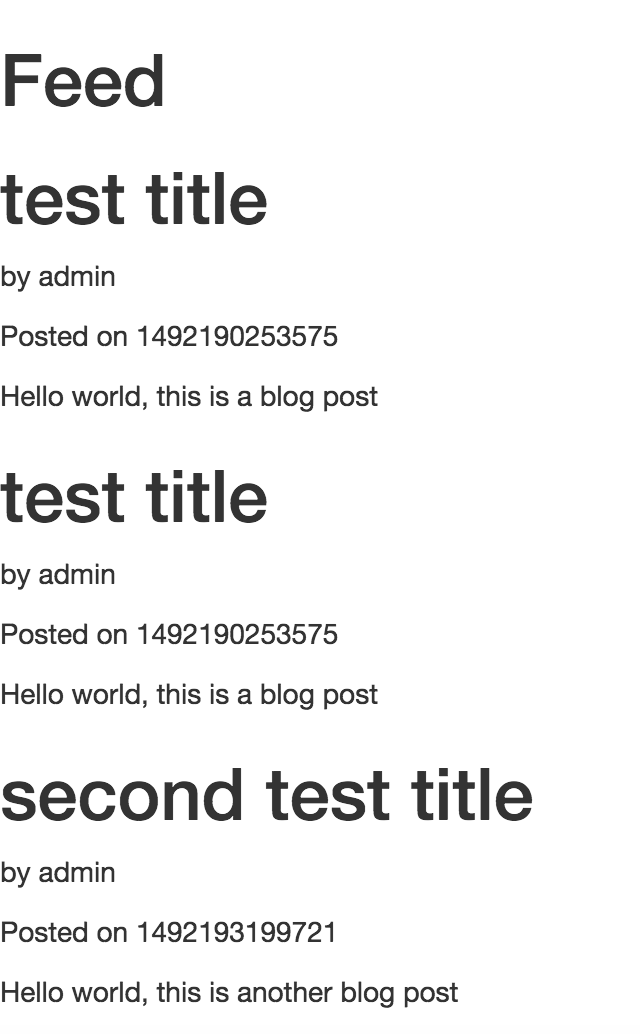
Fix the date formatting using the date_format function:
Posted on ${date_format(post.createdDate,‘yyyy-MM-dd’)}
Test in Incognito
Preview the feed in a new incognito browser and verify you can see the feed of posts as both a public and authenticated user, recursively toggling the security of the page until it performs as expected.
Redirect users to Feed on Login
Go back to the Login tree, and select the signin button.
Under Edit Mode Binding, fill in the Return URI with the page you’d like the users see upon login, in this case, feed. Make sure the page is visible for authenticated users.
You might want to do the same with signup.
Create new blog posts
As an authenticated user, I can create new blog posts that include a title and body text.
- Schema: The schema is already prepared for the creation of blog posts
- Data: Authenticated users will be able to create Posts, which will create more data!
- Pages: The feed page will be edited to allow users to create Posts
- Security: Authenticated users will be able to create Posts
Pages
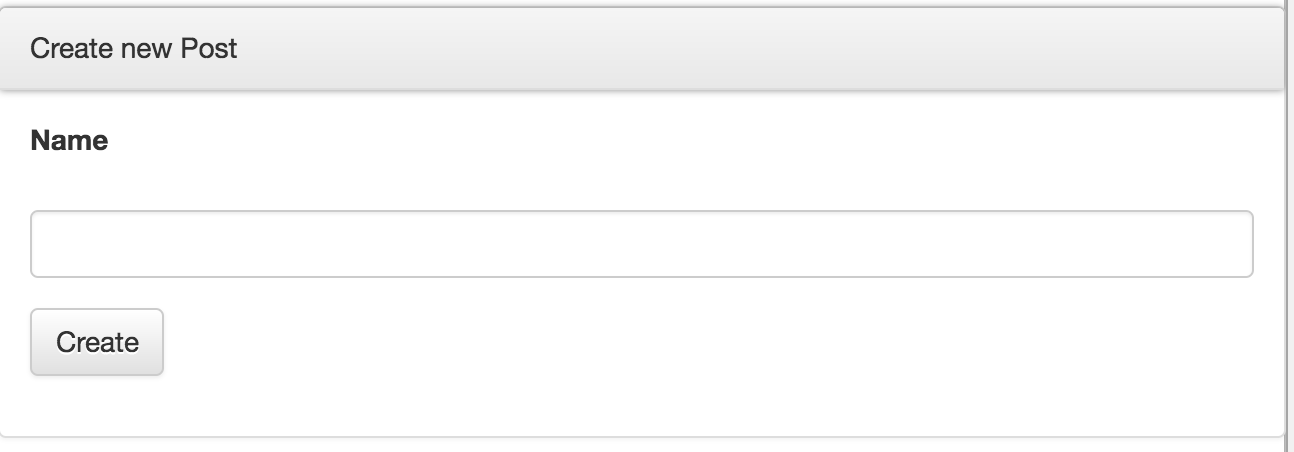
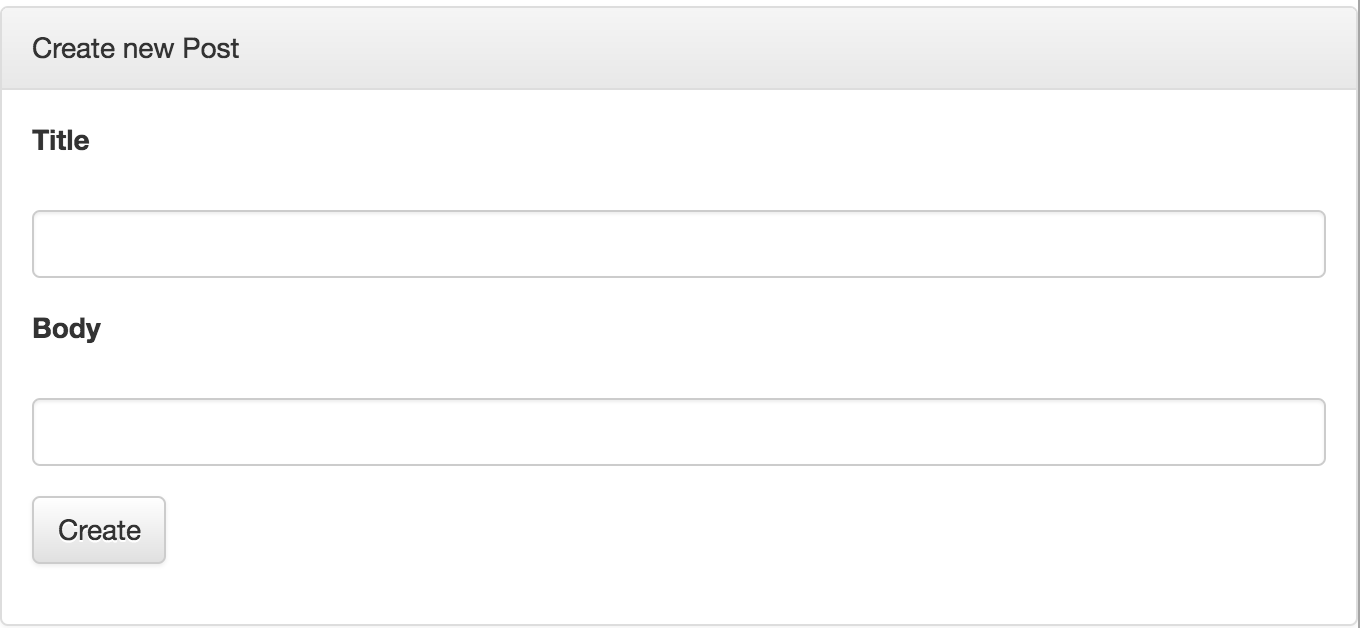
Open the Widgets menu and search for the Panel with Create Form (configurable). Then drag an instance of it into the body of the feed page, underneath the h1.

Select Post as the Type of the widget.
The widget creates Posts with name properties by default. It will be edited to create Posts with title and body properties.
Make a copy of the div wrapping the name input and drag it under the name parts.
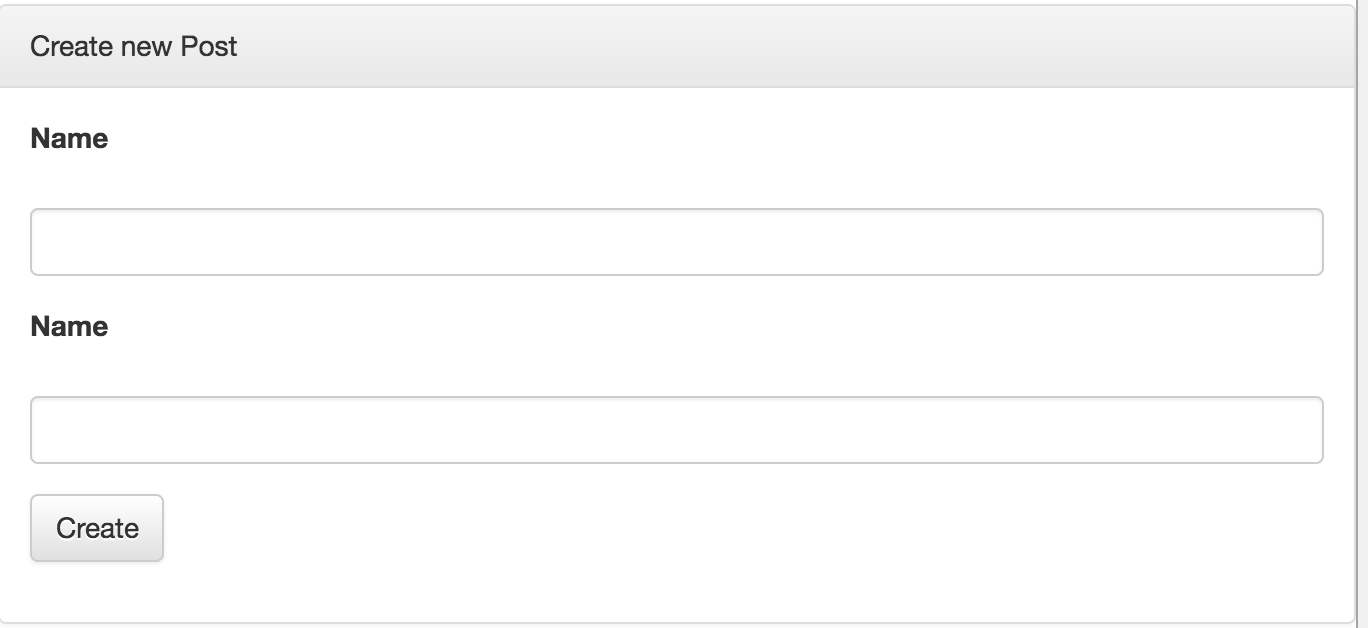
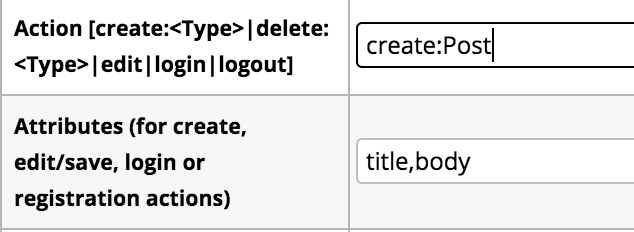
Change the top field labelled Name to title and change the bottom field also labelled Name to create the body post. You must also edit their names by going to Edit Mode Binding > Field to title and body, respectively
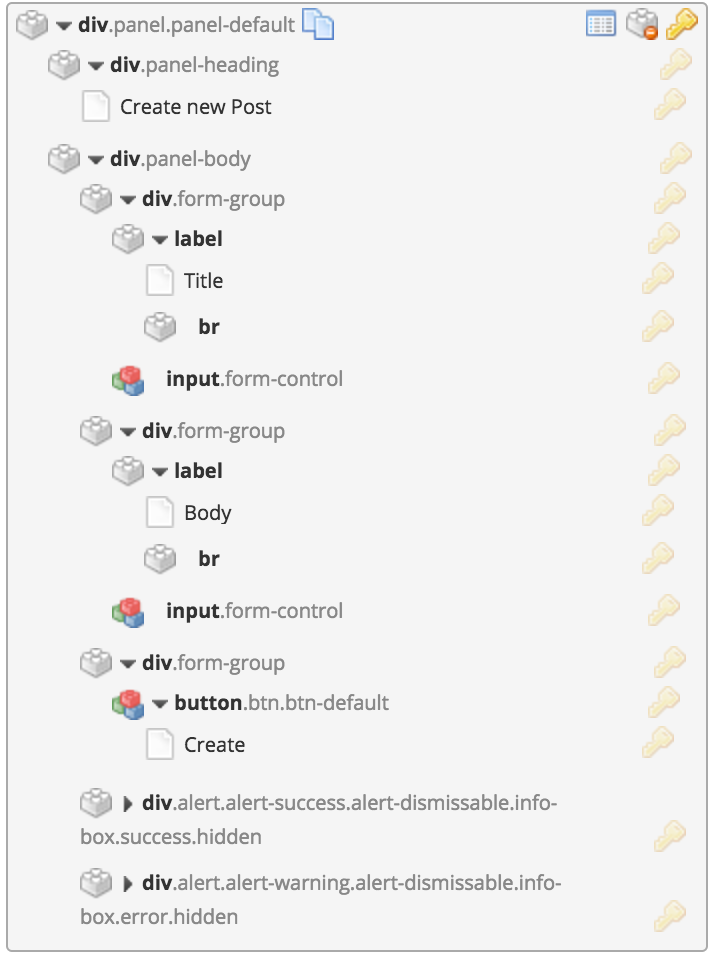
Edit the Create button accordingly:
Make the WRITER_OF Relationship
Add a <select> and <option> element to your Create Post form.
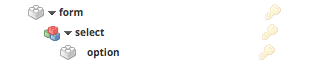
Configure the select element to reflect the name WRITER_OF relationship.

In order for the select element to be hidden, add the html class “hidden” to under HTML attributes:

Configure the option to have the ID of the current user as its value and be auto-selected.
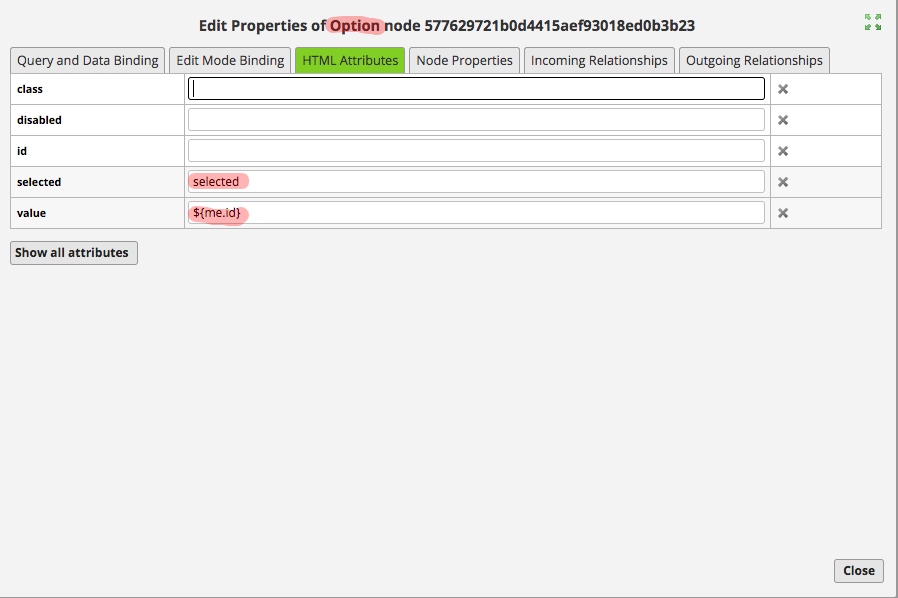
Add the attribute to the Create button.

Change the cardinality of the relationship between User and Post so that a Post can have only one author.
The currently logged in user will be set as the only writer of the current post.
The final result should look something like so:
Security
Although authenticated and public users should be able to see the feed page, only authenticated users can write posts. Set the Visibility of the form to authenticated users.
In the Security > Resource Access Grants tab, ensure that authenticated users can create Posts.

Test the app in an incognito window and ensure everything works as expected:
- Public users should be able to see the feed
- Authenticated users should be able to see the feed
- Authenticated users should be able to see and use the Create Post panel
- Public users should not be able to see or use the Create Post panel
If any of the requirements are not being met, toggle the visibility options for the elements in question until they are met.
Conclusion
You’re done! Follow the steps here https://support.structr.com/article/225 to export your work, and create the app you’ve always wanted using Structr. :)