
Example Application with Mobile Angular UI
This blog post describes the creation of an example application mentioned in the article about Structr's JSON/REST backend in the german Java Magazin 1/2015, pages 90 ff.
Framework: Mobile Angular UI
To demonstrate how easy it is to create a mobile application with Structr, I was looking for a framework covering three popular demands:
- optimized for mobile devices
- based on Bootstrap
- using AngularJS
Prerequisites
Prior to the installation of Mobile Angular UI, please remove the Welcome pageInstallation in Structr
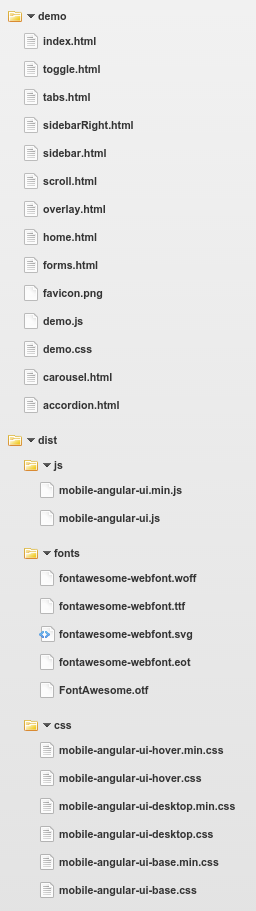
The easiest way to install a frontend framework like this in Structr is to upload a ZIP file and extract it. In this case, just download the ZIP archive to your local disk, drag and drop the icon onto the Files area and click the Expand icon. Structr automatically creates all folders and files contained in the archive.
Once uploaded and expanded, you need to move the subfolders demo and dist to the root level so that you can access files like e.g. index.html and mobile-angular-ui.min.js through the URLs http://localhost:8082/demo/index.html#/ and http://localhost:8082/dist/js/mobile-angular-ui.min.js.
To make sure all subsequent page requests are directed to this page, change the href attribute of the base tag of the index.html page to
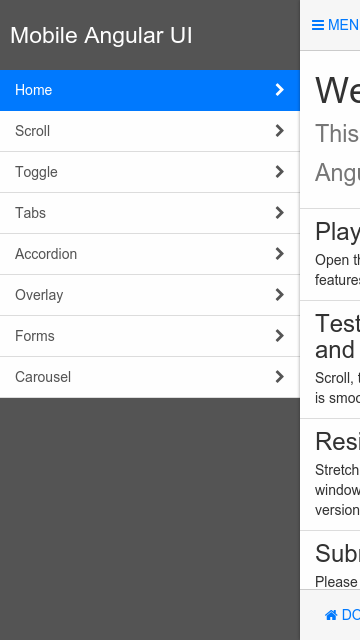
<base href="/demo/index.html" />You should see the demo page here http://localhost:8082/demo/index.html#/:
Create Data Model
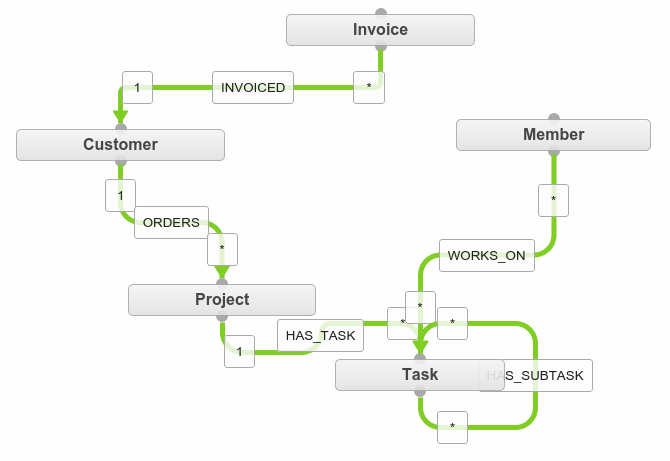
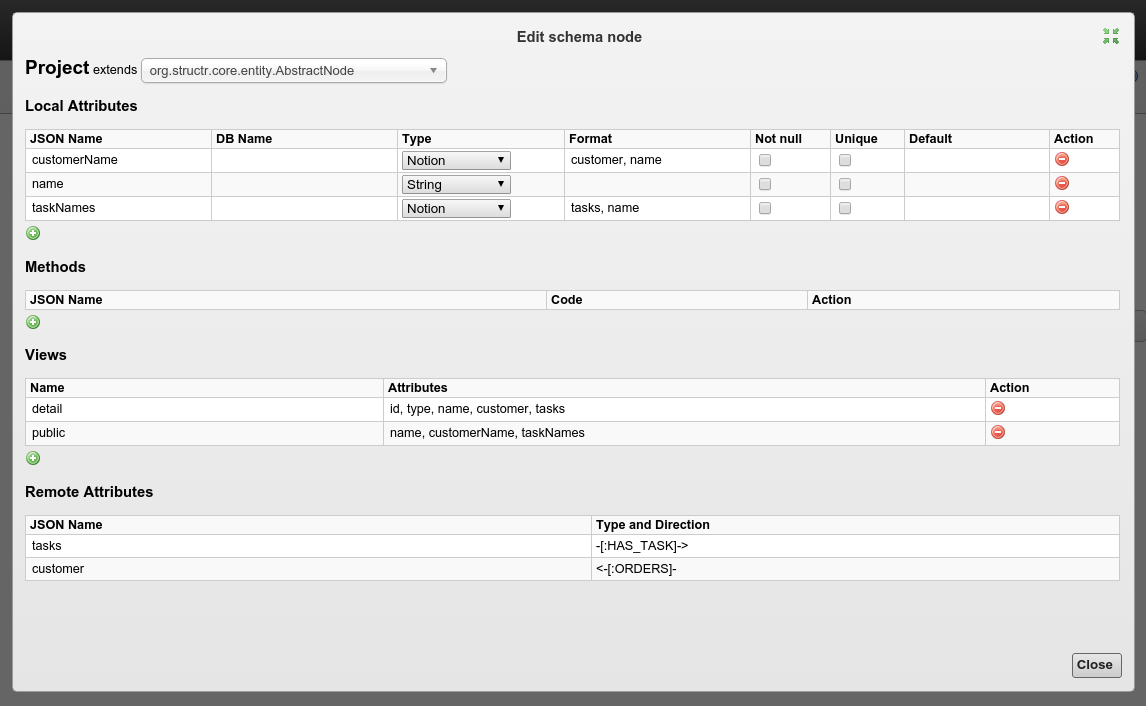
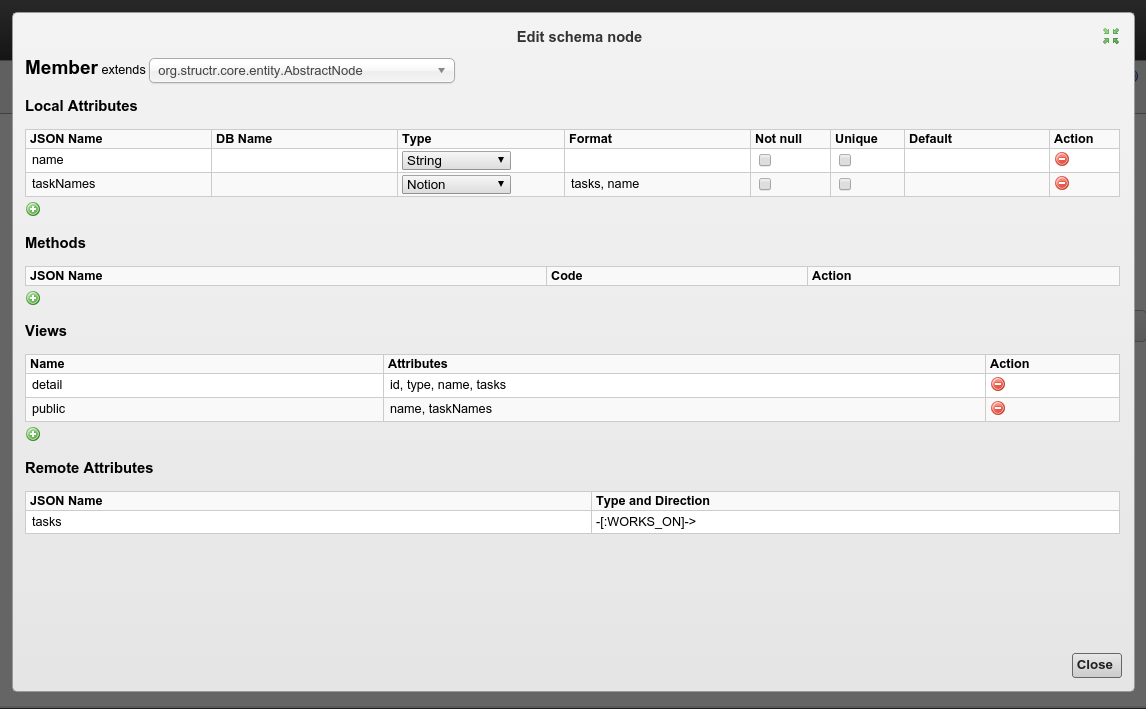
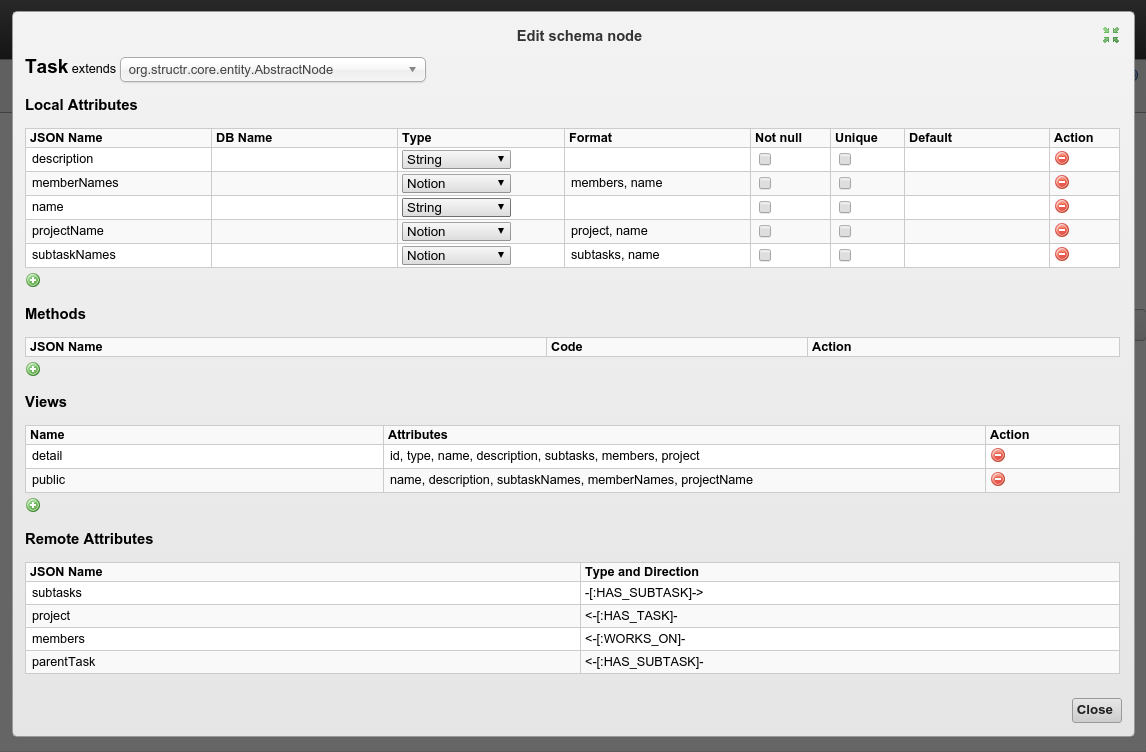
Go to the Schema Editor and create the types Invoice, Customer, Project, Member and Task, and relate them as shown in this picture. Make sure to set the cardinality (1:1, 1:*, *:* etc.) accordingly.
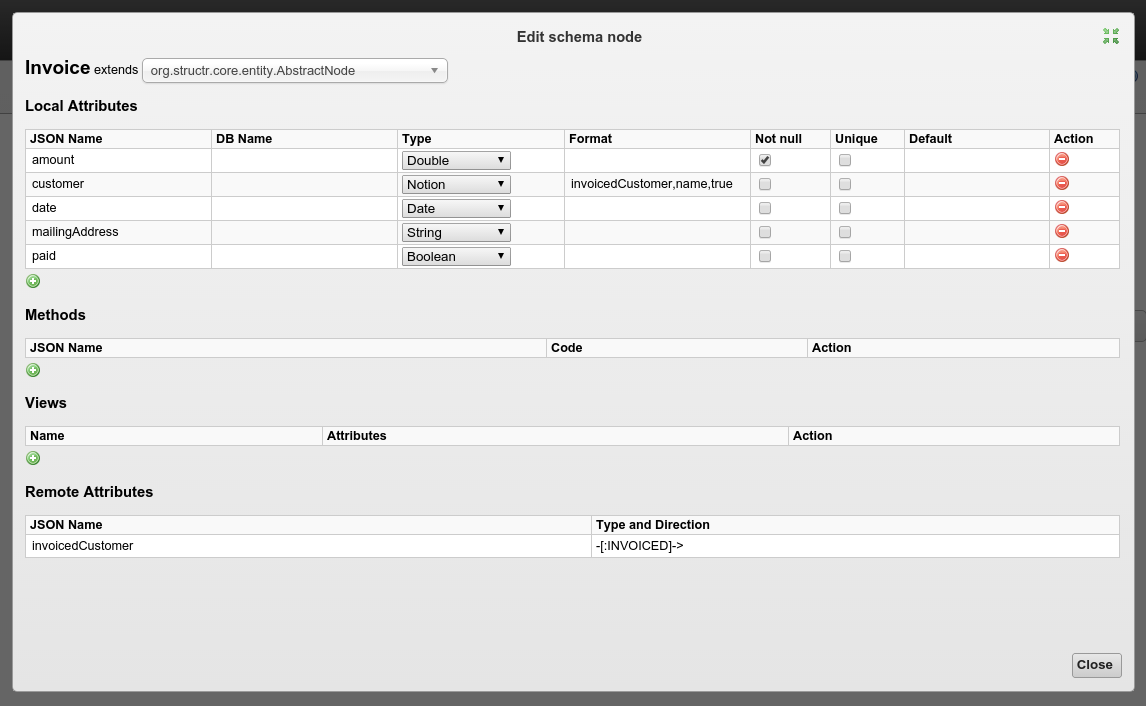
Create and rename the attributes as seen in the following pictures:

Create Test Data
You can now go to the Data section in Structr's backend UI and add objects of the configured custom types.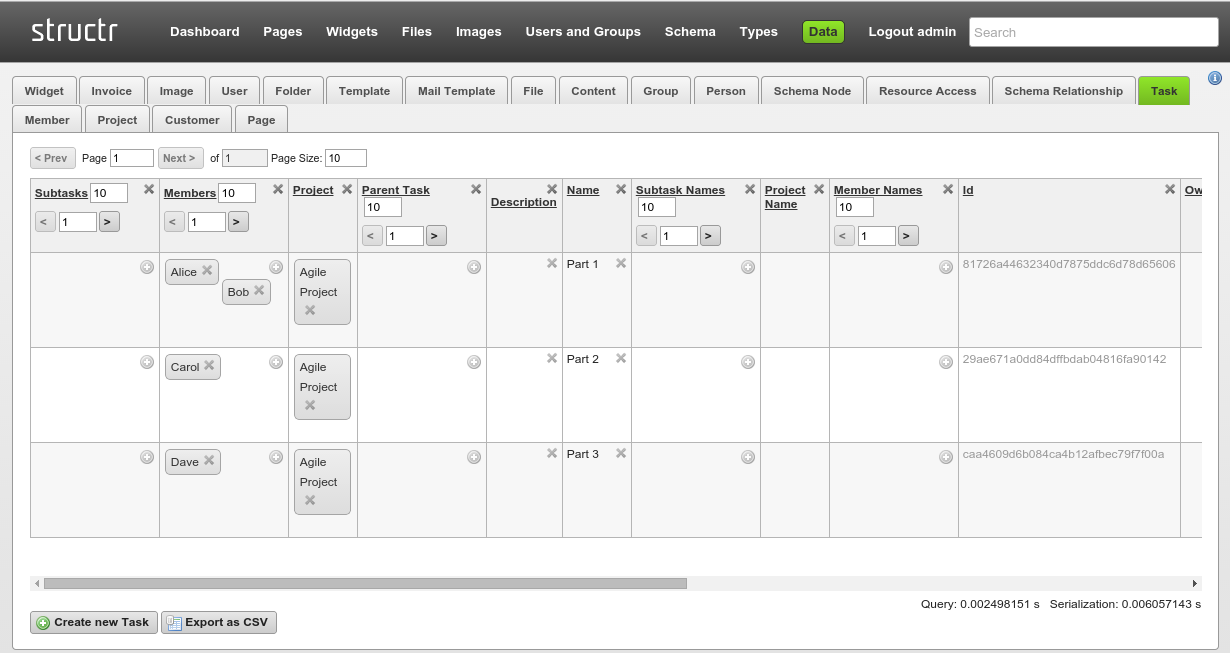
Data Binding
Now we bind the list of items you see when you click on Scroll to the list of tasks in demo.js:
82 app.controller('MainController', function($rootScope, $scope){ 82 app.controller('MainController', function($rootScope, $scope, $http, analytics){ 92 var scrollItems = [];
93
94 for (var i=1; i<=100; i++) {
95 scrollItems.push('Item ' + i);
96 }
97
98 $scope.scrollItems = scrollItems; 92 var scrollItems = [];
93
94 $http.get('/structr/rest/tasks').
95 success(function(data, status, headers, config) {
96
97 scrollItems = data.result.map(function(task) {
98 return task.name;
99 });
100 $scope.scrollItems = scrollItems;
101 }).
102 error(function(data, status, headers, config) {
103 console.log(data, status, headers, config);
104 });Bind Form Action
To make the app able to create invoices, we have to bind the form action to an appropriate HTTP POST request in forms.html and make sure the attribute names given in ng-model match the the ones set in the data model for the Invoice class:
<div content-for="title">
  <span>Forms</span>
</div>


<div class="scrollable">
 <div class="scrollable-content section">

   <form action="" id="">

     <div bs-panel title="Invoice">

       <input
        bs-form-control

        type="text"
        ng-model="invoice.customer"
        label="Customer"
        label-class="col-xs-3 col-sm-2 col-lg-1"
        class="col-xs-9 col-sm-10 col-lg-11"
        placeholder="Customer Name"
       />

       <switch
        bs-form-control
        ng-change="switchChanged()"
        ng-model="invoice.paid"
        ng-click="switchClicked()"
        label="Paid"
        label-class="col-xs-3 col-sm-2 col-lg-1"
        class="col-xs-9 col-sm-10 col-lg-11"
        >
        </switch>
       <input
        bs-form-control

        type="number"
        ng-model="invoice.amount"
        label="Amount"
        label-class="col-xs-3 col-sm-2 col-lg-1"
        class="col-xs-9 col-sm-10 col-lg-11"

        />

       <input
        bs-form-control
        type="date"
        ng-model="invoice.date"
        label="Date"
        label-class="col-xs-3 col-sm-2 col-lg-1"
        class="col-xs-9 col-sm-10 col-lg-11"

        />
     </div>

     <div bs-panel title="Notes">
       <textarea type="text" ng-model="invoice.mailingAddress" label="Address" bs-form-control>
       </textarea>
     </div>

    <div bs-panel class="form-actions">
      <div content-for="navbarAction" duplicate>
        <button class="btn btn-primary" ng-click="createInvoice()">
          Save
        </button>
      </div>
    </div>
   </form>

 </div>
</div>
The final action to is do add the createInvoice method in demo.js to the app controller:
135  $scope.createInvoice = function() {
136
137    $http.post('/structr/rest/invoices', $scope.invoice).
138    success(function(data, status, headers, config) {
139      console.log(data, status);
140    }).
141    error(function(data, status, headers, config) {
142      console.log(data, status);
143    });
144
145  };
This just binds the Save button to a HTTP POST action to /structr/rest/invoices, creating a new Invoice object.
You can download the complete demo database (db and files directories) as a ZIP file: structr-mobile-angular-ui.zip.